")
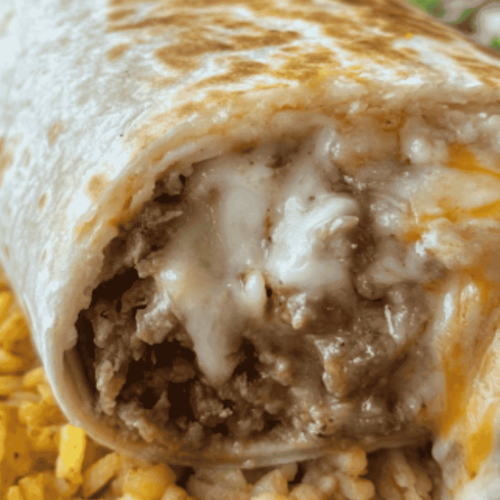
Ground Beef And Cheese Chimichanga
You Want Something Delicious? Let’s Make Chimichangas Toaday!
Hey there! 😄 If you’re anything like me, you love food that’s both tasty and easy to make, right?.
Well, I’ve got the perfect recipe for you—Ground Beef and Cheese Chimichangas!
These little crispy bundles of joy are filled with savory ground beef, melty cheese, and all the right spices. Trust me, once you take that first bite, you’ll be amazed!
You know how it is when you want something quick, but you still want it to be super satisfying.
That’s why this recipe is perfect; it comes together in no time and tastes just like something you’d get from your favorite Mexican restaurant. The best of all?
You can easily customize it with your favorite ingredients, like sour cream, guacamole, or salsa. I mean, who doesn’t love a meal that can be both simple and special?
I’m honestly so excited to share this one with you.
Ready to get cooking? I can’t wait for you to try this recipe, I know you’re going to love it as much as I do! Let’s get started!
How to Make Ground Beef and Cheese Chimichanga
Step 1: Gather Your Ingredients
Before we get started, grab all your ingredients. This will make life so much easier once you’re deep into the cooking process. Here’s what you need:
- 1 lb ground beef
- 1 packet taco seasoning (or homemade if you’re feeling extra)
- 1 cup shredded cheddar cheese (or mix it up with some Monterey Jack if you’re in the mood of)
- 1 can refried beans (optional, but highly recommended for extra creaminess)
- 4 large flour tortillas
- 1 small onion, chopped
- 1 tbsp olive oil (or vegetable oil if that’s your go-to)
- 1/2 tsp garlic powde
- 1/2 tsp cumin (this adds a nice earthy flavor)
- Salt and pepper to taste
- Vegetable oil for frying (just enough to get a nice golden brown color)
🍽 Essential Equipment for Making Ground Beef and Cheese Chimichanga
Disclaimer: You can find all these tools on Amazon. I trust this company! If you use the links below, I may earn a small commission at no extra cost to you. It’s a simple way to support my work while stocking your kitchen with quality cooking tools.
Here’s a list of the must-have tools to make delicious, crispy ground beef and cheese chimichangas right at home:
-
Large Skillet or Frying Pan – For browning the ground beef and sautéing ingredients evenly.
-
Wooden Spoon or Silicone Spatula – Gentle on cookware and perfect for stirring the beef mixture.
-
Mixing Bowls – For combining ingredients like cheese, seasonings, and cooked beef.
-
Measuring Cups and Spoons – For accurate measurements of spices and cheese.
-
Tortilla Warmer or Microwave-Safe Plate – To heat tortillas before filling and folding.
-
Tongs – Handy for flipping or moving chimichangas safely while cooking.
-
Deep Fryer or Large Heavy-Bottomed Pot – For deep-frying to crispy perfection (if not baking or air-frying).
-
Cooking Thermometer – To check the oil temperature (ideal: 350–375°F).
-
Baking Sheet and Wire Rack – If you prefer to
(Step-by-Step Instructions)
Step 2: Cook the Ground Beef
Get your skillet nice and hot, then add the olive oil. Toss in the chopped onions and cook until they’re soft and fragrant, about 3 minutes.
Next, add the ground beef. Break it up with your spatula and cook until browned and crumbly. Drain any excess grease (we don’t need that, trust me).
Step 3: Season it Right
Now, time to kick things up a notch! Sprinkle in your taco seasoning, garlic powder, cumin, salt, and pepper. Pour in a little water (about 1/4 cup), stir everything, and let it simmer for about 5 minutes. This will let all the flavors meld together like a happy taco family.
Step 4: Add the Refried Beans (Optional)
If you’re feeling extra creamy, spread a little layer of refried beans onto the tortillas. It adds a lovely texture and richness. Spread about 2 tablespoons on each tortilla.
Step 5: Fill Your Tortillas
Now, spoon about 1/4 cup of the beef mixture onto each tortilla. Sprinkle generously with cheese (because, cheese) and fold the sides in.
Roll it up tightly, like you’re making a burrito. The goal is a nice, snug little packet of deliciousness. Repeat with the other tortillas.
Step 6: Fry those Babies
Time to get crispy! Heat about 2 inches of vegetable oil in a large skillet over medium-high heat.
Once it’s nice and hot, carefully place your chimichangas seam-side down in the oil. Fry them until golden brown, about 3-4 minutes per side.
Make sure to keep an eye on them so they don’t burn!
Step 7: Drain and Serve
Once golden and crispy, place them on a paper towel-lined plate to drain excess oil. Let them sit for a minute before serving, just so they don’t burn your mouth (I know, you’re eager).
Common Mistakes to Avoid
Overfilling the tortillas: If you stuff the tortillas too much, you’ll have a hard time sealing them. Keep it light with the filling. It’s like when you overstuff a burrito, things get messy, and nobody wants that.
Not draining the beef: Excess grease in the filling means greasy chimichangas. So, drain that beef well after it’s cooked.
Using cold tortillas: Cold tortillas can crack when you try to roll them up. Warm them for 10-15 seconds in the microwave before filling them, and they’ll be much easier to work with.
Skipping the seasoning: A bland chimichanga is a sad chimichanga. Don’t skip the taco seasoning!
Under-frying or over-frying: Aim for golden brown, not black. Keep an eye on your oil temperature. Too hot, and they’ll burn. Too cold, and they won’t crisp up properly.
Recipe Best Tips
- Use a thermometer: If you’re not sure if the oil’s hot enough, use a thermometer. You want it around 350°F. If you drop a small piece of tortilla in, it should sizzle right away.
- Toppings, toppings, toppings: The fun doesn’t stop at the chimichanga! Serve these with sour cream, guacamole, salsa, or even a squeeze of lime for a little extra taste.
- Add a little heat: If you like spice, throw some diced jalapeños into the beef mixture or top with a spicy salsa.
- Cheese mix: Experiment with different cheeses like mozzarella or pepper jack for a twist on the classic.
👉Curious what recipes are blowing up on Pinterest? [I put the top 10 in a Free mini-book just for you]
Serving Suggestions
Here’s the thing: Chimichangas are perfect on their own, but why not take it up a notch?
Pair them with some crispy Mexican street corn (elote), a fresh salad, or a side of Mexican rice.
You can also serve them with a variety of dips like guac, salsa, or even a tangy crema for dipping. The possibilities are endless!
Storage and Freezing
- Storage: If you have leftovers, let them cool completely before storing them in an airtight container. They’ll last in the fridge for up to 3 days.
- Freezing: These freeze really well! After they’re cooked and cooled, wrap each chimichanga tightly in foil or parchment paper, then place them in a freezer-safe bag. They’ll last up to 3 months in the freezer. To reheat, just bake at 350°F for 15-20 minutes until heated through and crispy again.
Frequently Asked Questions (FAQs)
Q1: Can I make these in the oven instead of frying them?
A1: Yes, absolutely! For a healthier option, you can brush them lightly with oil and bake them at 400°F for 20-25 minutes, flipping halfway through. They won’t be quite as crispy, but still delicious!
Q2: Can I use chicken or turkey instead of ground beef?
A2: Yup, feel free to swap out the ground beef for cooked chicken or turkey. Just make sure it’s well-seasoned to pack a punch of flavor.
Q3: Do I have to use refried beans?
A3: Nope! They’re optional. But they add a nice creamy texture that works perfectly with the crispy exterior. If you’re not into them, just skip them and use more beef and cheese.
Q4: Can I make this recipe vegetarian?
A4: Totally! Just leave out the beef and use black beans or even some sautéed veggies like bell peppers and zucchini. It’s all about getting creative!
Q5: How can I make this dish spicier?
A5: You can add some chopped jalapeños into the beef mixture or top them with spicy salsa. If you want to go big, add a sprinkle of chili powder or cayenne into the filling for extra heat.
Q6: What kind of tortillas should I use?
A6: Flour tortillas work best for chimichangas. They’re soft and pliable, perfect for rolling up and frying. But you can use corn tortillas too if you’re going for that authentic Mexican touch!
Q7: How do I know when the chimichangas are done frying?
A7: When they turn a beautiful golden brown and are crispy all around, they’re ready! Give them a little press to see if they’re firm on the outside, and that’s your cue.
Conclusion
So there you have it, your very own ground beef and cheese chimichanga recipe that’ll make you feel like a pro in the kitchen.
Grab your ingredients, get rolling (literally), and enjoy these crispy, cheesy beauties. Don’t forget to share your chimichanga creations in the comments.
I can’t wait to see how you put your twist on this classic!
You Might Also Want To Try
⤵⬇
Ground Beef and Cheese Chimichangas
Ingredients
Ingredients for Ground Beef and Cheese Chimichangas
- 1 lb ground beef
- 1 cup shredded cheddar cheese you can use Monterey Jack or a blend if you prefer
- 1 small onion chopped
- 1 packet taco seasoning or homemade taco seasoning for a fresh flavor
- 1/2 cup salsa choose your favorite or use a mild, medium, or hot variety
- 4 large flour tortillas
- 2 tbsp vegetable oil for frying
- Salt and pepper to taste
Key Substitutions:
- Ground beef: You can swap this for ground turkey chicken, or even a plant-based ground meat if you're looking for a healthier or vegetarian option.
- Cheese: Feel free to mix and match with different cheeses like mozzarella pepper jack, or even queso blanco for extra flavor.
- Taco seasoning: If you don’t have a packet just mix cumin, chili powder, garlic powder, and paprika for a quick homemade version!
- These ingredients will give you that perfect chimichanga crunch and flavor you’re craving!
Instructions
How to Make Ground Beef and Cheese Chimichangas
- Alright, let’s get cooking! Follow these simple steps, and you’ll have crispy, cheesy perfection in no time.
Cook the Beef
- Heat a large skillet over medium heat. Add the ground beef and cook until browned, breaking it up with a spoon as it cooks.
- Toss in the chopped onion and cook for another 2–3 minutes until soft.
- Stir in the taco seasoning and salsa. Mix well and let it simmer for a couple of minutes. (Your kitchen should smell amazing by now!)
- Remove from heat and let it cool slightly.
Assemble the Chimichangas
- Lay out a tortilla on a flat surface.
- Spoon about ¼ of the beef mixture into the center.
- Sprinkle a generous handful of cheese on top (because there’s no such thing as too much cheese).
- Fold in the sides, then roll it up tightly like a burrito. Repeat with the rest.
Fry to Perfection
- Heat the vegetable oil in a large pan over medium heat.
- Carefully place each chimichanga seam-side down in the pan. Cook for 2–3 minutes per side until golden brown and crispy. (No flipping too soon—crispy is the goal!)
- Remove and drain on paper towels.
Serve and Enjoy!
- Plate them up and add your favorite toppings—sour cream, guacamole, salsa, or a little extra cheese.
- Take a bite and prepare to fall in love.
- That’s it! Easy, crispy, and ridiculously delicious. Now, grab a plate and enjoy! 😋
Notes
- Feel free to swap the ground beef for ground chicken or turkey for a lighter option.
- Taco seasoning can be replaced with your own homemade blend if preferred.
- For extra crunch, finish them off in the air fryer after frying!
")
")
")