 (1)")
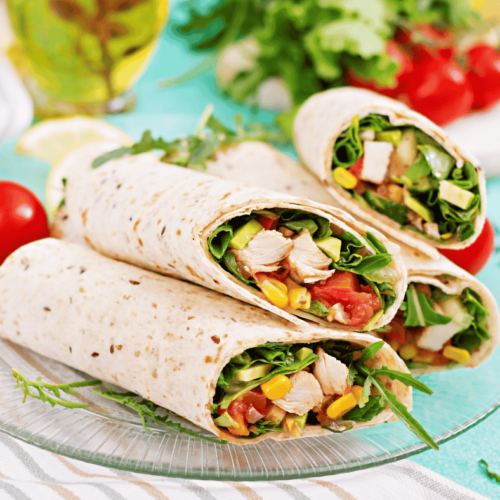
Cheese and Creamy Garlic Chicken Wraps
Let me tell you about a little obsession of mine—cheesy, creamy, garlicky goodness wrapped up in a warm tortilla.
There’s just something about that combo that makes every bite pure comfort. And the best of all? It’s ridiculously easy to make.
These Cheese and Creamy Garlic Chicken Wraps are one of those meals that feel fancy but take almost no effort to make.
Juicy chicken, rich garlic sauce, and melty cheese all come together in the perfect handheld bite.
Whether you’re making dinner for yourself, your family, or just need something quick and satisfying, this recipe has your back.
I know how it is—some nights, you don’t want to think too hard about what to cook.
You just want something that tastes amazing without spending hours in the kitchen.
That’s exactly why I love this wrap. It’s simple, full of flavor, and honestly, kind of addictive.
So, if you’re in the mood for something cheesy, creamy, and absolutely delicious, I’ve got you. Let’s make this together, you’re going to love it!
Ingredients List for Cheese and Creamy Garlic Chicken Wraps
For the Chicken & Sauce:
- 2 boneless, skinless chicken breasts (or use rotisserie chicken for a shortcut)
- 1 tablespoon olive oil (or butter for extra richness)
- 3 cloves garlic, minced (more if you love garlic)
- ½ teaspoon salt
- ½ teaspoon black pepper
- ½ teaspoon paprika (optional, for a little extra flavor)
- ½ cup heavy cream (or half-and-half for a lighter option)
- ¼ cup cream cheese, softened
- ½ cup shredded mozzarella (or your favorite melty cheese)
For the Wraps:
- 4 large flour tortillas (or use whole wheat for a healthier twist)
- ½ cup shredded cheddar cheese (or any cheese you love)
- ¼ cup chopped fresh parsley (optional, for garnish)
- ½ cup lettuce or spinach (for a fresh crunch)
Optional Add-ins:
- Crispy bacon bits (because bacon makes everything better)
- Sliced avocado (for creaminess)
- Diced tomatoes (for a fresh burst of flavor)
Now that we’ve got everything ready, let’s get our hands on it!
Step-by-Step Instructions
Step 1: Prep the Ingredients
- Mince 3 cloves of garlic.
- Shred ½ cup of mozzarella and ½ cup of cheddar (or more, because why not?).
- Chop parsley, lettuce, or any add-ins you want.
- If using rotisserie chicken, shred it now.
Step 2: Cook the Chicken
- Heat 1 tablespoon of olive oil in a large pan over medium heat.
- Season 2 chicken breasts with salt, pepper, and paprika.
- Cook for 6-7 minutes per side until golden brown and fully cooked.
- Remove from the pan, let it rest, then slice or shred.
Step 3: Make the Creamy Garlic Sauce
- In the same pan, add minced garlic and cook for 30 seconds until fragrant.
- Pour in ½ cup heavy cream and stir in ¼ cup cream cheese until smooth.
- Add ½ cup shredded mozzarella and stir until fully melted.
- Return the chicken to the pan, coating it in the creamy garlic sauce.
Step 4: Assemble the Wraps
- Lay out 4 large flour tortillas on a flat surface.
- Sprinkle cheddar cheese in the center.
- Add a scoop of creamy garlic chicken on top.
- Toss in lettuce, parsley, and any extras you like.
- Fold in the sides, then roll up tightly.
Step 5: Toast for Extra Flavor
- Heat a clean pan over medium heat.
- Place the wrap seam-side down and toast for 1-2 minutes per side until golden brown.
- Remove from heat, slice, and admire your creation.
Step 6: Eat & Enjoy!
Common Mistakes to Avoid (So You Don’t Mess Up Your Wrap
🚫 Overcooking the Chicken – Dry chicken is the worst. Cook it just until it’s done (internal temp: 165°F), then let it rest before slicing. This keeps it juicy!
🚫 Burning the Garlic – Garlic goes from “amazing” to “why does this taste like sadness?” in seconds. Only cook it for 30 seconds on low heat until fragrant.
🚫 Skipping the Toasting Step – A cold, floppy wrap? No thanks. Toast it for 1-2 minutes per side for that golden, slightly crispy finish. Game-changer!
🚫 Overloading the Wrap – I get it, you want ALL the cheese and chicken. But if you overstuff, it’ll fall apart. Keep it balanced so you can actually roll it up.
🚫 Forgetting to Seal the Wrap Properly – If you don’t fold the sides in before rolling, everything will spill out like a sad burrito fail. Fold, roll, then toast!
🚫 Not Using Enough Sauce – The creamy garlic sauce is the star! Don’t be shy—coat that chicken well so every bite is juicy and flavorful.
🚫 Using the Wrong Tortilla – Too small? You’ll struggle to roll it. Too thin? It might tear. Stick with large, soft flour tortillas for the best results.
Follow these tips, and your wraps will be next-level delicious.
Variations & Customizations – Make It Your Own!
Spicy Version – Love heat? Add sriracha, hot sauce, or red pepper flakes to the creamy garlic sauce. You can also toss in some jalapeños for extra fire!
Keto-Friendly – Skip the tortilla and serve your creamy garlic chicken in lettuce wraps or over cauliflower rice. Swap heavy cream for unsweetened almond milk if you want to cut some fat.
Vegetarian – Swap the chicken for grilled mushrooms, tofu, or chickpeas. Keep the creamy garlic sauce the same, and boom—you’ve got a delicious meat-free version!
Extra Cheesy Goodness – Mix in Parmesan or Gouda for a deeper, richer flavor. If you’re a true cheese lover, add a melty cheese pull moment by stuffing a little extra inside before toasting.
BBQ Ranch Remix – Skip the garlic sauce and toss the chicken in BBQ sauce, then drizzle with ranch dressing before wrapping. It’s smoky, tangy, and just plain addictive!
Serving & Presentation Tips – Make It Look (and Taste) Even Better!
Slice It Right
- Always let the wrap rest for 1-2 minutes after toasting. This keeps everything from spilling out when you cut it.
- Use a sharp knife and slice it at an angle (diagonal cuts look fancier and make it easier to eat).
Plate It
- Arrange the wrap halves slightly overlapping for that “I totally know what I’m doing” vibe.
- If serving for guests, use a wooden cutting board or a stylish plate—way better than just plopping it down on the counter.
Add Some Color & Crunch
- Sprinkle fresh chopped parsley or green onions on top for a pop of color.
- Serve with a side of crispy fries, a fresh salad, or a handful of tortilla chips for texture contrast.
Dipping Sauce is a Must
- Drizzle extra creamy garlic sauce on the plate for dipping.
- Want variety? Offer ranch, hot sauce, or honey mustard for extra flavor options.
Go the Extra Mile
- If you want that Instagram-worthy touch, place a lemon wedge or a small bowl of pickled onions on the side.
- A sprinkle of flaky sea salt on top right before serving = chef’s kiss.
Boom—now your wraps don’t just taste amazing, they look like they belong in a food magazine!
Storage & Freezing – Keep Your Wraps Fresh!
Storing Leftovers (Fridge)
Best for: 2-3 days
- Wrap leftover un-toasted wraps tightly in plastic wrap or foil to keep them from drying out.
- Store in an airtight container in the fridge.
- When ready to eat, toast in a pan for 2-3 minutes per side or microwave for 30-45 seconds (but pan-toasting is way better!).
🚫 Avoid storing already toasted wraps—they’ll get soggy fast!
Freezing for Later
Best for: Up to 2 months
- Wrap each un-toasted wrap individually in parchment paper, then in foil or a zip-top freezer bag.
- To reheat, thaw overnight in the fridge or microwave straight from frozen for 1-2 minutes.
- For the best texture, toast in a pan for 3-4 minutes per side after reheating.
Quick Tip:
If freezing, leave out watery ingredients like fresh lettuce and tomato—add them fresh after reheating for the best taste!
Frequently Asked Questions (FAQs)
1️⃣ Can I use a different type of cheese?
Absolutely! Cheddar, Gouda, Pepper Jack, or even Feta work great. Just pick something that melts well for that gooey goodness!
2️⃣ What if I don’t have tortillas?
No problem! Swap them for pita bread, naan, or even lettuce wraps if you’re going low-carb.
3️⃣ Can I make this ahead of time?
Yes, but don’t toast it until you’re ready to eat—otherwise, it’ll get soggy. Just wrap it up and store it in the fridge, then toast when needed.
4️⃣ How do I make this extra crispy?
Use butter or a little olive oil in the pan when toasting, and press it down lightly with a spatula. A panini press works great too!
5️⃣ Can I make this dairy-free?
Yep! Swap the cheese for a dairy-free alternative and use coconut milk or a dairy-free cream substitute for the sauce.
6️⃣ What’s the best way to reheat leftovers?
Skip the microwave if possible—it can make the wrap soggy. Instead, toast it in a pan for 2-3 minutes per side for the best texture.
7️⃣ Can I add more veggies?
Of course! Sautéed mushrooms, bell peppers, spinach, or sun-dried tomatoes would be delicious in this wrap. Just don’t overload it, or it’ll be hard to fold!
Conclusion
And that’s it—your homemade Cheese & Creamy Garlic Chicken Wrap that’s so good, you might just start a fan club.
Once you taste that melty, garlicky goodness, store-bought wraps will feel like a total disappointment.
If you try this recipe, I’d love to hear how it turned out! Did you add a twist? Go extra cheesy? Spice it up? Drop a comment or tag me—I need to know!
Now you may want to try
⤵⬇
Cheese and Creamy Garlic Chicken Wraps
Ingredients
Ingredients List for Cheese and Creamy Garlic Chicken Wraps
For the Chicken & Sauce:
- 2 boneless skinless chicken breasts (or use rotisserie chicken for a shortcut)
- 1 tablespoon olive oil or butter for extra richness
- 3 cloves garlic minced (more if you love garlic)
- ½ teaspoon salt
- ½ teaspoon black pepper
- ½ teaspoon paprika optional, for a little extra flavor
- ½ cup heavy cream or half-and-half for a lighter option
- ¼ cup cream cheese softened
- ½ cup shredded mozzarella or your favorite melty cheese
For the Wraps:
- 4 large flour tortillas or use whole wheat for a healthier twist
- ½ cup shredded cheddar cheese or any cheese you love
- ¼ cup chopped fresh parsley optional, for garnish
- ½ cup lettuce or spinach for a fresh crunch
Optional Add-ins:
- Crispy bacon bits because bacon makes everything better
- Sliced avocado for creaminess
- Diced tomatoes for a fresh burst of flavor
Instructions
How to Cook Cheese and Creamy Garlic Chicken Wraps: A Step-by-Step Guide
- Cooking these wraps is as easy as it gets. Just follow these simple steps, and you’ll have a cheesy, garlicky masterpiece in no time.
Step 1: Prep the Ingredients
- Mince 3 cloves of garlic.
- Shred ½ cup of mozzarella and ½ cup of cheddar (or more, because why not?).
- Chop parsley, lettuce, or any add-ins you want.
- If using rotisserie chicken, shred it now.
Step 2: Cook the Chicken
- Heat 1 tablespoon of olive oil in a large pan over medium heat.
- Season 2 chicken breasts with salt, pepper, and paprika.
- Cook for 6-7 minutes per side until golden brown and fully cooked.
- Remove from the pan, let it rest, then slice or shred.
Step 3: Make the Creamy Garlic Sauce
- In the same pan, add minced garlic and cook for 30 seconds until fragrant.
- Pour in ½ cup heavy cream and stir in ¼ cup cream cheese until smooth.
- Add ½ cup shredded mozzarella and stir until fully melted.
- Return the chicken to the pan, coating it in the creamy garlic sauce.
Step 4: Assemble the Wraps
- Lay out 4 large flour tortillas on a flat surface.
- Sprinkle cheddar cheese in the center.
- Add a scoop of creamy garlic chicken on top.
- Toss in lettuce, parsley, and any extras you like.
- Fold in the sides, then roll up tightly.
Step 5: Toast for Extra Flavor
- Heat a clean pan over medium heat.
- Place the wrap seam-side down and toast for 1-2 minutes per side until golden brown.
- Remove from heat, slice, and admire your creation.
Step 6: Eat & Enjoy!
- Take a bite, enjoy the creamy, cheesy goodness, and try not to eat them all at once! 😏
")
")
")