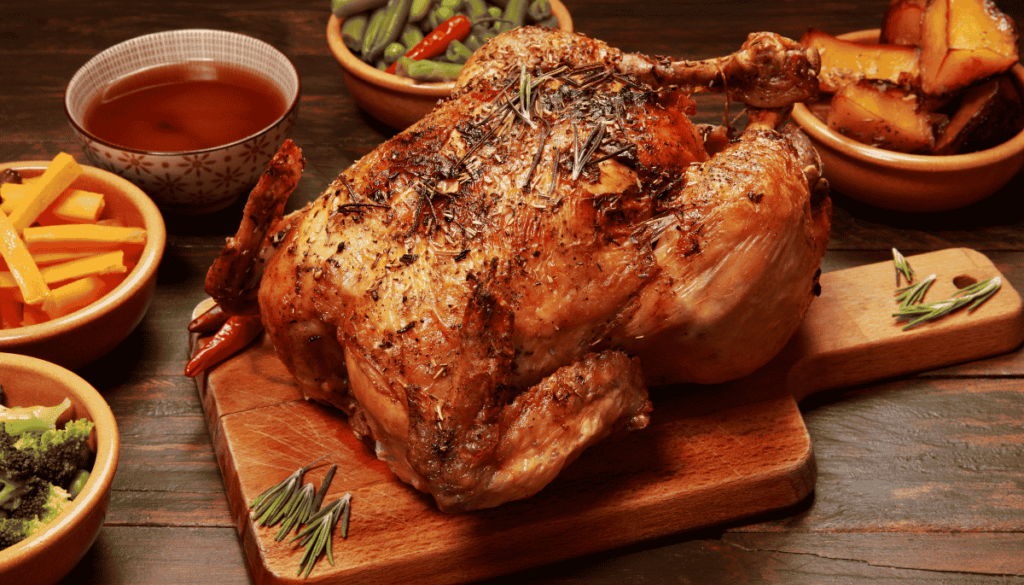
Baked Chicken Recipe
Hello there! How are doing today? I know how it goes—you’re standing in the kitchen, staring at a pack of chicken, thinking, What do I do with this?
You want something easy, something delicious, but also something that won’t leave you scrubbing pans all night. I totally get it. That’s why I’m sharing my go-to baked chicken recipe with you today.
This isn’t just any baked chicken. It’s juicy, full of flavor, and so simple that once you make it, you’ll have it memorized. No complicated steps, no fancy ingredients—just real, good food that comes out perfect every single time.
Whether you need a quick dinner for the family or meal prep for the week, this is the recipe you’ll keep coming back to again and again.
And let’s talk about the best part of this recipe: no dry, boring chicken here. You know what I mean—the kind that needs a gallon of sauce just to make it edible.
Nope, we’re making tender, flavorful chicken that practically melts in your mouth today. Sound good?
I’ll walk you through every step, so you’ll know exactly what to do. And trust me, once you try this out, you won’t look at baked chicken the same way again. Let’s get started!
Ingredients
- 4 boneless, skinless chicken breasts (or thighs for extra juiciness)
- 2 tbsp olive oil (or melted butter for a richer flavor)
- 1 tsp salt (adjust to taste)
- ½ tsp black pepper
- 1 tsp garlic powder
- 1 tsp onion powder
- 1 tsp paprika (adds color and a subtle smoky flavor)
- ½ tsp dried oregano or Italian seasoning (optional but adds great depth)
- ½ tsp chili powder (optional for a little heat)
- Juice of ½ a lemon (optional but brightens up the flavor)
💡 Substitutions & Tips
- Swap olive oil for avocado oil if you prefer.
- Use smoked paprika for a deeper, smoky taste.
- Add a pinch of cayenne if you like it spicy.
- Fresh garlic works too—just mince 2 cloves and mix with the oil.
How to Cook Baked Chicken: Step-by-Step
- Preheat the oven to 400°F (200°C). Let’s get that oven nice and hot so the chicken bakes up juicy and golden.
- Prep your baking dish – Lightly grease a baking dish or line a sheet pan with parchment paper. No one likes scrubbing stuck-on chicken.
- Pat the chicken dry – Use a paper towel to remove excess moisture. This helps the seasoning stick and gives you a better texture.
- Mix the seasoning – In a small bowl, combine salt, pepper, garlic powder, onion powder, paprika, oregano, and chili powder (if using).
- Coat the chicken – Rub each piece with olive oil, then sprinkle the seasoning mix all over. Use your hands—yes, it’s a little messy, but it’s worth it!
- Arrange in the dish – Place the chicken in the baking dish, making sure they aren’t touching. Crowded chicken = uneven cooking.
- Bake for 20–25 minutes – Depending on thickness, chicken breasts need about 20 minutes; thighs may need a few extra minutes.
- Check for doneness – Use a meat thermometer if you have one. 165°F (75°C) = done. No thermometer? Slice into the thickest part—juices should run clear.
- Rest for 5 minutes – Let the chicken sit before slicing. This keeps all those delicious juices inside instead of on your cutting board.
- Serve and enjoy! – Pair it with veggies, rice, or throw it on a salad. Boom—dinner is done!
Told you this was easy! Now go enjoy that juicy, perfectly seasoned chicken. 😊
Common Mistakes to Avoid (and How to Fix Them!)
- Overcooking = Dry, Sad Chicken
- Nobody likes chewing on a piece of rubber. Use a meat thermometer and pull it out at 165°F (75°C)—not 200°F!
- Nobody likes chewing on a piece of rubber. Use a meat thermometer and pull it out at 165°F (75°C)—not 200°F!
- Skipping the Resting Time
- I know, you’re hungry. But if you slice too soon, all the juices escape, and you end up with dry chicken. Let it sit for 5 minutes—it’s worth it!
- I know, you’re hungry. But if you slice too soon, all the juices escape, and you end up with dry chicken. Let it sit for 5 minutes—it’s worth it!
- Forgetting to Pat the Chicken Dry
- Extra moisture = steamed chicken, not baked. Use a paper towel to dry it off before seasoning for the best texture.
- Extra moisture = steamed chicken, not baked. Use a paper towel to dry it off before seasoning for the best texture.
- Underseasoning
- Chicken is like a blank canvas—it needs seasoning! Don’t just sprinkle salt and hope for the best. Coat it well for real flavor.
- Chicken is like a blank canvas—it needs seasoning! Don’t just sprinkle salt and hope for the best. Coat it well for real flavor.
- Crowding the Pan
- If your chicken is crammed together, it won’t cook evenly. Give each piece space so they bake properly and get that nice golden color.
- If your chicken is crammed together, it won’t cook evenly. Give each piece space so they bake properly and get that nice golden color.
- Not Preheating the Oven
- Throwing chicken into a cold oven? Nope. Always preheat so it starts cooking the second it goes in.
- Throwing chicken into a cold oven? Nope. Always preheat so it starts cooking the second it goes in.
- Relying on Guesswork
- “Eh, I think it’s done” is not a cooking technique. Use a meat thermometer or cut into the thickest part to check for clear juices.
Variations & Customizations
- Spicy Kick: Love heat? Add ½ tsp cayenne pepper or a drizzle of hot sauce before baking. Want extra bold flavor? Mix in some chili flakes or a dash of sriracha.
- Garlic Butter Upgrade: Swap olive oil for melted butter and mix in 1 minced garlic clove before brushing it onto the chicken. This makes it rich, buttery, and downright addictive.
- Lemon Herb Refresh: Skip the paprika and chili powder, and instead, add fresh lemon juice, rosemary, and thyme for a bright, zesty flavor. Perfect for summer.
- Keto-Friendly Cheesy Goodness: Sprinkle grated Parmesan on top during the last 5 minutes of baking. It adds a crispy, cheesy crust with zero extra carbs.
Serving & Presentation Tips
- Let It Rest First: I know you’re excited to dig in, but hold on! Let the chicken rest for 5 minutes so the juices redistribute. This keeps it moist and flavorful.
- Slice or Serve Whole?
- If serving as a main dish, plate each piece whole for a classic look.
- For salads, grain bowls, or wraps, slice it against the grain for the most tender bites.
- If serving as a main dish, plate each piece whole for a classic look.
- Pair It Like a Pro
- Healthy: Serve with roasted veggies, quinoa, or a crisp green salad.
- Comforting: Mashed potatoes, mac and cheese, or buttery rice.
- Light & Fresh: Slice and serve in tacos, wraps, or on top of a fresh Caesar salad.
- Healthy: Serve with roasted veggies, quinoa, or a crisp green salad.
- Garnish for Extra Flair
- A little fresh parsley, cilantro, or green onions adds color and a pop of freshness.
- Lemon wedges on the side give a bright, zesty contrast to the savory flavors.
- A little fresh parsley, cilantro, or green onions adds color and a pop of freshness.
- Sauce It Up: Drizzle with garlic butter, BBQ sauce, honey mustard, or tzatziki for extra flavor.
How to Serve Baked Chicken
This baked chicken is super versatile! Serve it whole with your favorite sides for a hearty meal, or slice it up for salads, wraps, and grain bowls. Want something simple?
Pair it with roasted veggies and a squeeze of lemon for a light, fresh dish. Feeling indulgent?
Serve it with mashed potatoes or mac and cheese for the ultimate comfort food. No matter how you plate it, a sprinkle of fresh herbs or a drizzle of sauce takes it to the next level. Enjoy!
Presentation Ideas for Baked Chicken
- Classic & Elegant
- Place the chicken on a white plate with roasted veggies on the side.
- Garnish with fresh parsley and a lemon wedge for a pop of color.
- Place the chicken on a white plate with roasted veggies on the side.
- Rustic & Cozy
- Serve on a wooden cutting board with mashed potatoes and green beans.
- Drizzle with garlic butter for an inviting, homey feel.
- Serve on a wooden cutting board with mashed potatoes and green beans.
- Light & Fresh
- Slice the chicken and place it over a bed of mixed greens with cherry tomatoes.
- Add a light vinaigrette and a sprinkle of feta for a refreshing touch.
- Slice the chicken and place it over a bed of mixed greens with cherry tomatoes.
- Family-Style Feast
- Arrange the chicken on a large serving platter with rice, roasted potatoes, and a variety of sauces.
- Let everyone build their own plate for
- Arrange the chicken on a large serving platter with rice, roasted potatoes, and a variety of sauces.
Recipe Best Tips
Pat the Chicken Dry: Before seasoning, use a paper towel to remove excess moisture. This helps the seasoning stick and creates a better texture.
Season Generously: Don’t be shy! Coat the chicken evenly with spices to get the best flavor in every bite.
Use a Wire Rack: Place the chicken on a wire rack over a baking sheet. This helps the heat circulate, cooking it evenly and keeping the bottom from getting soggy.
Don’t Overcook: Use a meat thermometer! Chicken is perfect at 165°F (75°C)—any higher, and it dries out.
Rest Before Slicing: Let the chicken sit for 5 minutes after baking. This locks in the juices and keeps it tender.
Add a Final Touch: A squeeze of fresh lemon, a drizzle of honey, or a sprinkle of Parmesan adds extra depth to the flavor.
Storage & Freezing Instructions
Refrigerating Leftovers
- Let the chicken cool to room temperature before storing.
- Place it in an airtight container or wrap it tightly in foil.
- Store in the fridge for up to 4 days.
Reheating Tips
- Oven (Best Method): Bake at 350°F (175°C) for 10–15 minutes to keep it juicy.
- Stovetop: Heat in a covered pan on low heat with a splash of broth or water.
- Microwave: Use short 30-second bursts to avoid drying it out.
Freezing for Later
- Wrap each piece in plastic wrap, then place in a freezer-safe bag.
- Store for up to 3 months.
- To Reheat: Thaw in the fridge overnight, then warm up using the oven or stovetop methods above.
Proper storage keeps your chicken fresh, juicy, and ready for quick meals anytime!
Frequently Asked Questions (FAQs)
1. How do I know when the chicken is fully cooked?
Use a meat thermometer! The internal temperature should be 165°F (75°C) at the thickest part. If you don’t have a thermometer, cut into the chicken—there should be no pink and the juices should run clear.
2. Can I use chicken thighs instead of breasts?
Absolutely! Chicken thighs are juicier and more flavorful. Just increase the baking time by 5-10 minutes, as they take longer to cook.
3. Why is my chicken dry?
Overcooking is the main culprit. Stick to 165°F (75°C) and let the chicken rest for 5 minutes before slicing to keep the juices locked in.
4. Can I marinate the chicken overnight?
Yes! A longer marinade (up to 24 hours) boosts flavor and tenderness. If using an acidic marinade (like lemon or vinegar), keep it under 12 hours to avoid a mushy texture.
5. What’s the best way to add extra flavor?
Try a dry rub of garlic powder, smoked paprika, and onion powder, or brush with a glaze like honey mustard or BBQ sauce in the last 10 minutes of baking.
6. Can I make this in an air fryer?
Yep! Bake at 375°F (190°C) for 15–18 minutes, flipping halfway. This gives you a crispy outside and juicy inside.
7. What’s the best way to store and reheat leftovers?
Store in an airtight container in the fridge for up to 4 days. Reheat in the oven at 350°F (175°C) for best results or microwave in 30-second bursts with a little broth to keep it moist.
Conclusion
And there you have it—your perfect baked chicken! Juicy, flavorful, and so easy to make, you’ll wonder why you ever settled for dry, boring chicken before. Once you try this, store-bought rotisserie chicken will feel like a distant memory!
Give it a shot, and when you do, let me know how it turns out! Got a fun twist or a secret ingredient? Share your version—I’d love to hear it!
Now you may want to try
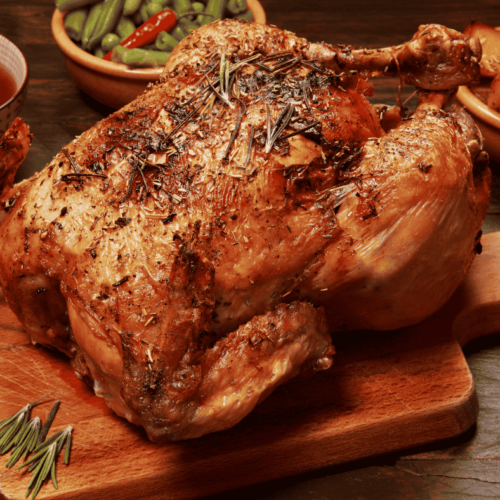
Baked Chicken
Ingredients
Ingredients
- 4 boneless skinless chicken breasts (or thighs for extra juiciness)
- 2 tbsp olive oil or melted butter for a richer flavor
- 1 tsp salt adjust to taste
- ½ tsp black pepper
- 1 tsp garlic powder
- 1 tsp onion powder
- 1 tsp paprika adds color and a subtle smoky flavor
- ½ tsp dried oregano or Italian seasoning optional but adds great depth
- ½ tsp chili powder optional for a little heat
- Juice of ½ a lemon optional but brightens up the flavor
💡 Substitutions & Tips
- Swap olive oil for avocado oil if you prefer.
- Use smoked paprika for a deeper smoky taste.
- Add a pinch of cayenne if you like it spicy.
- Fresh garlic works too—just mince 2 cloves and mix with the oil.
Instructions
How to Cook Baked Chicken: Step-by-Step
- Preheat the oven to 400°F (200°C). Let’s get that oven nice and hot so the chicken bakes up juicy and golden.
- Prep your baking dish – Lightly grease a baking dish or line a sheet pan with parchment paper. No one likes scrubbing stuck-on chicken.
- Pat the chicken dry – Use a paper towel to remove excess moisture. This helps the seasoning stick and gives you better texture.
- Mix the seasoning – In a small bowl, combine salt, pepper, garlic powder, onion powder, paprika, oregano, and chili powder (if using).
- Coat the chicken – Rub each piece with olive oil, then sprinkle the seasoning mix all over. Use your hands—yes, it’s a little messy, but it’s worth it!
- Arrange in the dish – Place the chicken in the baking dish, making sure they aren’t touching. Crowded chicken = uneven cooking.
- Bake for 20–25 minutes – Depending on thickness, chicken breasts need about 20 minutes; thighs may need a few extra minutes.
- Check for doneness – Use a meat thermometer if you have one. 165°F (75°C) = done. No thermometer? Slice into the thickest part—juices should run clear.
- Rest for 5 minutes – Let the chicken sit before slicing. This keeps all those delicious juices inside instead of on your cutting board.
- Serve and enjoy! – Pair it with veggies, rice, or throw it on a salad. Boom—dinner is done!
- Told you this was easy! Now go enjoy that juicy, perfectly seasoned chicken. 😊
Notes
- Use chicken thighs for a juicier, richer flavor.
- Let the chicken rest for 5 minutes before slicing to keep it moist.
- Want extra crispy skin? Bake at a higher temp (425°F/220°C) for the last 5 minutes.
- Store leftovers in an airtight container for up to 4 days or freeze for later.
Did you make this recipe?
Share a photo and leave a comment — we can't wait to see what you've made! 💖
