")
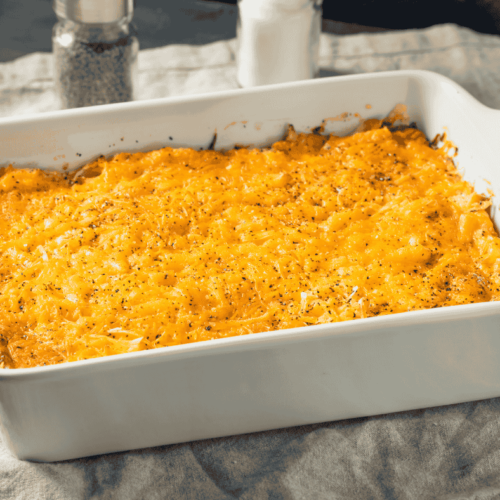
Shredded Rotisserie Chicken Casserole
Hey there! I’ve got a recipe that’s about to become your new go-to for dinner starting today.
This is Shredded Rotisserie Chicken Casserole, it’s the perfect mix of comfort, flavor, and ease.
I know how busy life can get sometimes, and I totally get that you need meals that are quick, but still delicious. This casserole does just that!
You don’t need to spend hours in the kitchen to make this recipe, and the best of all? You only need a few simple ingredients. I mean 12.
You can even skip the cooking part by grabbing a rotisserie chicken from the store. How easy is that? All you have to do is shred it up, throw it all together, and put it in the oven. And BOOM, dinner served with minimal effort.
I can already picture you enjoying the warm, cheesy goodness with your family or friends.
And guess what? It’s so customizable! You can add your favorite veggies or seasonings to make it just right for you.
So, are you ready to make something delicious and stress-free tonight? I promise you, this recipe will be a winner.
Ingredients for Shredded Rotisserie Chicken Casserole

Here’s what you’ll need to make this delicious casserole:
- 1 rotisserie chicken (shredded)
- 2 cups shredded cheese (cheddar or a mix of your favorite cheeses)
- 1 can of cream of chicken soup (or use cream of mushroom soup for a twist)
- 1 cup sour cream
- 1/2 cup milk
- 1 cup frozen peas (or any veggies you love)
- 1 teaspoon garlic powder
- 1 teaspoon onion powder
- 1/2 teaspoon salt (adjust to taste)
- 1/4 teaspoon black pepper
- 1 1/2 cups crushed crackers (or use breadcrumbs for a crunchier topping)
- 2 tablespoons melted butter
Key Substitutions:
- Rotisserie chicken: Use cooked chicken breast or even turkey if you prefer.
- Sour cream: Greek yogurt works as a lighter alternative.
- Frozen peas: Feel free to swap with corn, carrots, or broccoli for a different flavor.
- Cheese: Mozzarella or Monterey Jack will work great too, depending on your preference!
🛠️ Tools You’ll Need for Perfect Shredded Rotisserie Chicken Casserole
Disclaimer: You can find all these tools on Amazon. I trust this company! If you use the links below, I may earn a small commission at no extra cost to you. It’s a simple way to support my work while stocking your kitchen with quality cooking tools.
-
Large Mixing Bowl – To combine the shredded chicken, veggies, sauce, and seasonings.
-
Measuring Cups and Spoons – For precise ingredient portions.
-
Cutting Board and Knife – To chop vegetables or dice additional ingredients.
-
9×13-Inch Baking Dish – Perfect size for casseroles. Glass or ceramic works best.
-
Can Opener – If your recipe uses canned soup, beans, or vegetables.
-
Mixing Spoon or Silicone Spatula – For stirring ingredients thoroughly.
-
Aluminum Foil – To cover the casserole while it bakes (if needed).
-
Oven Mitts – Safety first when pulling that hot dish out of the oven.
-
Cooling Rack (optional) – Allows air circulation if you want to cool the dish before serving.
-
Serving Spoon – For scooping generous helpings straight from the dish.
How to Cook Shredded Rotisserie Chicken Casserole: Step-by-Step Instructions

Now you’ve got everything ready to create this mouthwatering casserole. Let’s get cooking!
Step 1: Preheat Your Oven
Set your oven to 350°F (175°C). You’ll want it nice and hot to bake your casserole perfectly!
Step 2: Shred the Chicken
Grab that rotisserie chicken and shred it up. It doesn’t need to be fancy, just pull apart those tender chicken pieces.
You’ll end up with about 3 cups of shredded chicken. Don’t worry if some pieces are bigger than others. It’s all going in the same place!
Step 3: Mix the Sauce
In a large bowl, mix together the cream of chicken soup, sour cream, milk, garlic powder, onion powder, salt, and pepper. Stir it up until everything is nice and smooth.
Step 4: Add the Chicken & Veggies
Put the shredded chicken into the mix and stir until it’s all coated. Add the frozen peas (or veggies of your choice) and give it one last stir. This is starting to look tasty already!
Step 5: Cheese, Please!
Add in 1 1/2 cups of shredded cheese and stir until it’s evenly combined. You know what they say—more cheese, more taste.
Step 6: Transfer to a Baking Dish
Grease a 9×13-inch baking dish (or whatever you’ve got). Dump the chicken mixture into the dish and spread it out evenly.
- Top It Off
Sprinkle the crushed crackers (or breadcrumbs) evenly on top of the casserole. Drizzle that melted butter over the top for extra crunch and golden color. - Bake It!
Put it in the oven and bake for 25-30 minutes, or until it’s bubbling and the top is golden brown. If you’re tempted to peek halfway through, go ahead—it smells amazing! - Enjoy!
Once it’s done, let it cool for a few minutes (if you can wait). Serve it up, and get ready for some serious compliments!
And that’s it! Quick, easy, and oh-so-delicious.
👉Curious what recipes are blowing up on Pinterest? [I put the top 10 in a Free mini-book just for you]
Common Mistakes to Avoid (and How to Fix Them!)

⑴ Forgetting to Shred the Chicken Properly
You grabbed the rotisserie chicken but didn’t shred it enough. Now you’ve got giant chicken chunks that won’t mix well. Shred the chicken into bite-sized pieces! The smaller, the better. It helps the flavors blend evenly.
⑵ Not Greasing the Baking Dish
You put everything in the dish without greasing it first, and now, the casserole’s sticking.
A quick spray of cooking spray or a little butter on the dish before adding the mixture will save you a lot of frustration later.
⑶ Overbaking or Underbaking
You get distracted (hey, it happens) and leave it in too long, or not long enough. Now the top is either burnt or soggy.
Keep an eye on it! Bake until it’s bubbly and golden brown, about 25-30 minutes. If the top starts to brown too quickly, cover it with foil for the last few minutes.
⑷ Skipping the Veggies
You’re in a rush and skip the veggies, thinking you won’t miss them.
Don’t skip the veggies!
They add color, flavor, and some good-for-you nutrients. And, frozen peas are super quick and easy—no excuses!
⑸ Not Letting It Cool Before Serving
You pull it out of the oven, get way too excited, and serve it too soon.
Give it a few minutes to cool before serving. It’ll make serving easier, and you won’t burn your mouth. Trust me, it’s worth the wait!
👉Curious what recipes are blowing up on Pinterest? [I put the top 10 in a Free mini-book just for you]
Variations & Customizations

Ready to make this casserole your own? Here are a few fun variations you can try:
Keto-Friendly Version
Want to keep it low-carb? No problem!
-
- Swap the crackers: Use crushed pork rinds or almond flour-based breadcrumbs for a crunchy, low-carb option.
- Substitute the peas: Opt for a veggie like zucchini, spinach, or cauliflower instead.
- Cheese it up: Go all in with full-fat cheese to keep it rich and satisfying.
- Swap the crackers: Use crushed pork rinds or almond flour-based breadcrumbs for a crunchy, low-carb option.
Spicy Chicken Casserole
Vegetarian Delight
-
- Skip the chicken: Replace it with your favorite plant-based protein (tofu, tempeh, or lentils work great).
- Extra veggies: Load it up with a variety of vegetables like mushrooms, bell peppers, and spinach.
- Creamy sauce: Use a plant-based cream or dairy-free sour cream for a completely vegan option.
- Skip the chicken: Replace it with your favorite plant-based protein (tofu, tempeh, or lentils work great).
Serving & Presentation Tips for Shredded Rotisserie Chicken Casserole

⒈ Let It Cool for a Few Minutes
As tempting as it is to serve, let the casserole cool for about 5 minutes before serving. This helps it set, making it easier to cut and plate.
⒉ Cut It Into Perfect Squares
Using a sharp knife or spatula, cut the casserole into nice, even squares. Aim for about 6-8 servings. This way, everyone gets a generous portion without it falling apart.
⒊ Use a Wide, Flat Spatula
To scoop up the casserole, use a wide, flat spatula. This will make sure you get all the cheesy, chicken-filled goodness without leaving a mess behind.
⒋ Garnish It
A bit of chopped parsley or green onions on top adds a pop of color and freshness. If you’re feeling fancy, add a light drizzle of sour cream or a sprinkle of extra cheese right before serving.
⒌ Serve with a Side Salad
This casserole is rich and hearty, so balance it with a light side salad. A simple green salad with a tangy vinaigrette pairs beautifully, and it’s easy!
⒍ Make It Buffet-Style
If you’re serving this at a gathering or family dinner, dish out the casserole on a big platter and let everyone help themselves. It’s casual, fun, and everyone can grab exactly how much they want.
6. Pair with a Drink
This casserole goes perfectly with a nice cold drink. A chilled glass of white wine or sparkling water with a slice of lemon can elevate the meal!
👉Curious what recipes are blowing up on Pinterest? [I put the top 10 in a Free mini-book just for you]
Best Tips for the Shredded Rotisserie Chicken Casserole
Use Rotisserie Chicken for Ease
Save time and add flavor by using pre-cooked rotisserie chicken. It’s tender, juicy, and makes the casserole come together in no time. Just shred it up, and you’re good to go!
Add Extra Cheese for a Creamier Texture
If you love cheesy, gooey casseroles (who doesn’t?), add a little extra cheese, either inside the casserole or sprinkled on top. It’ll melt perfectly and make it extra rich and comforting.
Season to Taste
Don’t be afraid to adjust the seasoning! Taste as you go and add more salt, pepper, or your favorite spices like garlic powder, onion powder, or paprika. It’s all about making it your perfect flavor!
Try Frozen Veggies for Quick Prep
Frozen vegetables, like peas or corn, are a great shortcut. They’re quick, easy to put in, and add extra flavor and nutrients to the dish without any extra effort.
Keep an Eye on It
The top layer should be golden brown and bubbly, but keep an eye on it to avoid burning. If it’s browning too fast, cover the dish with foil and let it bake the rest of the way through.
Storage and Freezing Tips for Leftovers

① Storing in the Fridge
-
- Allow the casserole to cool completely before storing.
- Transfer leftovers to an airtight container or cover the casserole dish tightly with plastic wrap or foil.
- It will stay fresh in the fridge for 3-4 days.
- Allow the casserole to cool completely before storing.
② Freezing Leftovers
-
- Let the casserole cool to room temperature before freezing.
- For best results, slice the casserole into individual portions. This makes it easier to thaw and reheat later.
- Wrap each portion in plastic wrap, then place it in a freezer-safe bag or container.
- It can be frozen for up to 3 months.
- Let the casserole cool to room temperature before freezing.
③ Reheating
-
- To reheat, you can either:
- In the microwave: Place a portion on a microwave-safe plate and heat for 2-3 minutes, or until hot.
- In the oven: Preheat to 350°F (175°C) and bake for 20-25 minutes (or until heated through). If frozen, you may need to bake it longer.
- In the microwave: Place a portion on a microwave-safe plate and heat for 2-3 minutes, or until hot.
- Don’t forget to cover with foil while reheating in the oven to keep it moist!
- To reheat, you can either:
Frequently Asked Questions (FAQs)
- Can I use chicken breast instead of rotisserie chicken?
Yes! If you don’t have rotisserie chicken, you can cook and shred your own chicken breast. Just be sure to season it well so it’s flavorful and juicy! - Can I make this casserole ahead of time?
Absolutely! You can assemble the casserole the night before, cover it, and refrigerate it until you’re ready to bake. Just add a few extra minutes to the baking time if it’s coming straight from the fridge. - Is this recipe gluten-free?
The recipe itself is naturally gluten-free, but check the ingredients in your cream of chicken soup and any other packaged ingredients to make sure they’re gluten-free if that’s important to you. - Can I add other vegetables to the casserole?
Yes! Feel free to mix in your favorite veggies, like spinach, bell peppers, or mushrooms. Just chop them small and cook them beforehand so they don’t release too much water. - Can I freeze this casserole?
Yes! You can freeze the casserole before or after baking. Just make sure to wrap it tightly in plastic wrap or foil, then store it in a freezer-safe bag or container for up to 3 months. - How long does this casserole last in the fridge?
Leftovers can be stored in the fridge for about 3-4 days. Make sure it’s in an airtight container to keep it fresh! - Can I make this recipe vegetarian?
Yes! You can swap the chicken for a plant-based protein like tofu, tempeh, or even beans. Just make sure to adjust the seasoning to taste, and you’ll have a tasty vegetarian version!

Conclusion
And there you have it! This Shredded Rotisserie Chicken Casserole is the perfect balance of comfort, flavor, and convenience.
Once you try it, I’m pretty sure you’ll be amazed and won’t want to ever buy store-bought again! Who needs that when you can whip up this crowd-pleaser in no time? 🙌
I’d love to see how your version turns out! Feel free to get creative and make it your own, and if you’ve got any fun twists, share them with me.
Now, let’s be honest: there’s no way you’ll be able to resist making this dish again. It’s just that good.
👉Before you go, don’t miss these trending dinners — [Free Cookbook Inside!]
You Might Want To Try
Enjoy💖
⤵⬇
Shredded Rotisserie Chicken Casserole
Ingredients
Ingredients for Shredded Rotisserie Chicken Casserole
- Here’s what you’ll need to make this delicious casserole:
- 1 rotisserie chicken shredded
- 2 cups shredded cheese cheddar or a mix of your favorite cheeses
- 1 can cream of chicken soup or use cream of mushroom soup for a twist
- 1 cup sour cream
- 1/2 cup milk
- 1 cup frozen peas or any veggies you love
- 1 teaspoon garlic powder
- 1 teaspoon onion powder
- 1/2 teaspoon salt adjust to taste
- 1/4 teaspoon black pepper
- 1 1/2 cups crushed crackers or use breadcrumbs for a crunchier topping
- 2 tablespoons melted butter
Key Substitutions:
- Rotisserie chicken: Use cooked chicken breast or even turkey if you prefer.
- Sour cream: Greek yogurt works as a lighter alternative.
- Frozen peas: Feel free to swap with corn carrots, or broccoli for a different flavor.
- Cheese: Mozzarella or Monterey Jack will work great too depending on your preference!
Instructions
How to Cook Shredded Rotisserie Chicken Casserole: A Step-by-Step Guide
- Ready to make this casserole? Here’s your no-stress guide—let’s get cooking!
Preheat Your Oven
- Set your oven to 350°F (175°C). You’ll want it nice and hot to bake your casserole to perfection!
Shred the Chicken
- Grab that rotisserie chicken and shred it up. It doesn’t need to be fancy—just pull apart those tender chicken pieces. You’ll end up with about 3 cups of shredded chicken. Don’t worry if some pieces are bigger than others. It’s all going in the same place!
Mix the Sauce
- In a large bowl, mix together the cream of chicken soup, sour cream, milk, garlic powder, onion powder, salt, and pepper. Stir it up until everything is nice and smooth. No lumps allowed here!
Add the Chicken & Veggies
- Toss the shredded chicken into the mix and stir until it’s all coated. Add the frozen peas (or veggies of your choice) and give it one last stir. This is starting to look tasty already!
Cheese, Please!
- Add in 1 1/2 cups of shredded cheese and stir until it’s evenly combined. You know what they say—more cheese, more happiness.
Transfer to a Baking Dish
- Grease a 9x13-inch baking dish (or whatever you’ve got). Dump the chicken mixture into the dish and spread it out evenly.
Top It Off
- Sprinkle the crushed crackers (or breadcrumbs) evenly on top of the casserole. Drizzle that melted butter over the top for extra crunch and golden color.
Bake It!
- Pop it into the oven and bake for 25-30 minutes, or until it’s bubbling and the top is golden brown. If you’re tempted to peek halfway through, go ahead—it smells amazing!
Enjoy!
- Once it’s done, let it cool for a few minutes (if you can wait). Serve it up, and get ready for some serious compliments!
- And that’s it! Quick, easy, and oh-so-delicious. Ready to dig in?
Notes
- Feel free to add your favorite vegetables like spinach or bell peppers to the casserole.
- For an extra cheesy version, sprinkle more cheese on top before baking.
- This recipe is also great for meal prepping and can be stored in the fridge for up to 4 days.
")
")
")