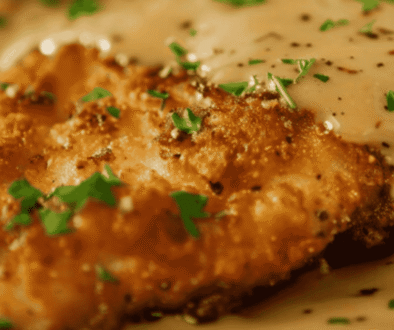
Crispy Baked Chicken Wings Crockpot Recipe
Hey there, friend! 🖐️ Are you ready to make some seriously delicious chicken wings without all the hassle today?
I’ve got the perfect recipe for you—crispy baked chicken wings, made right in your trusty Crockpot!
Yup, you heard me right, no frying, no mess. Just crispy, tender wings that’ll make you feel like a kitchen pro in no time.
You know those moments when you crave something tasty, but you don’t want to spend forever in the kitchen?
This recipe is made just for you! It’s super easy, doesn’t take a ton of effort, and gives you that perfect crispy texture on the outside, while keeping the inside juicy and tender.
And, the best part? It’s a set-it-and-forget-it kind of meal. You can let the Crockpot do all the hard work while you get on with your day.
I know life gets busy, but when you’re craving some wings that are a little extra crispy and totally mouthwatering, this recipe is a total game-changer.
It’s also great for when you’ve got friends or family coming over, or just want to treat yourself. Trust me, you’ll be hooked after the first bite!
Ready to get cooking? Let’s dive right into it, and I’ll walk you through every step. You’ve got this, and I’m here to help every step of the way. Let’s make these wings your new favorite go-to meal together!
Ingredients
- 10-12 chicken wings (You can also use drumsticks if you prefer)
- 1 tbsp olive oil (or any oil you have on hand)
- 1 tsp garlic powder
- 1 tsp onion powder
- 1 tsp paprika (for a smoky flavor, you can use smoked paprika)
- ½ tsp salt
- ½ tsp black pepper
- ½ tsp cayenne pepper (adjust to your spice level, or leave it out if you prefer mild)
- ½ cup chicken broth (vegetable broth works too for a lighter option)
- 1 tbsp soy sauce (can substitute with coconut aminos for a gluten-free option)
- 1 tbsp honey (maple syrup is a great alternative for a slightly different flavor)
How to Cook Crispy Baked Chicken Wings in the Crockpot
- Prep the Wings: Start by giving your chicken wings a little rinse and pat them dry with a paper towel. We want them crispy, not soggy!
- Season the Wings: In a bowl, mix together the garlic powder, onion powder, paprika, salt, black pepper, and cayenne pepper. Toss the wings in this seasoning mix until they’re all coated, like a little flavor blanket.
- Get the Crockpot Ready: Drizzle your olive oil into the Crockpot and spread it around. Then, add the seasoned wings in a single layer. Don’t worry if they’re stacked a bit—just get them in there!
- Add the Liquids: Pour the chicken broth, soy sauce, and honey over the wings. This will help them cook tender and juicy while giving them that extra flavor punch. (You’re doing great, by the way!)
- Set and Forget: Cover the Crockpot and cook on low for 4-5 hours. Yep, that’s it. Just let it do its thing while you relax, catch up on a show, or pretend you’re a chef. 🍳
- Crisp Them Up: Once the wings are tender, preheat your oven to 400°F (200°C). Carefully remove the wings from the Crockpot and place them on a baking sheet lined with parchment paper (because no one likes a messy cleanup!).
- Bake for Crispy Goodness: Pop those wings in the oven for 15-20 minutes, or until they’re golden and crispy on the outside. You can even flip them halfway through if you want even crispier skin.
- Serve and Enjoy: Once your wings are crispy and delicious, take a moment to admire your work. You did that! Serve them up with your favorite dipping sauce, and watch everyone be amazed by how tasty they are.
Mistakes to Avoid When Making Crispy Baked Chicken Wings
- Skipping the Drying Step: Don’t be lazy—dry those wings! If you skip this step, they won’t crisp up in the oven. Use a paper towel and pat them dry like you’re giving them a mini spa treatment.
- Overcrowding the Crockpot: I get it, you’re hungry and want to fit all the wings in, but don’t cramp them up! If you pile them in too thickly, they won’t cook evenly. Spread them out in a single layer or cook in batches. Your wings will thank you.
- Not Using Parchment Paper: Cleaning up after cooking is the worst, right? So, don’t forget the parchment paper! If you skip it, you’ll be scraping stuck-on chicken bits from your baking sheet. Trust me, it’s worth the extra minute.
- Skipping the Final Bake: If you think you can skip the baking part and just serve them straight from the Crockpot… no! The magic happens in the oven, where they get that crispy golden goodness. No crispy skin = no happy you.
- Not Adjusting the Spice: Not all of us have the same spice tolerance. If you’re not into heat, cut down on the cayenne pepper or skip it altogether. You don’t need a fiery mouth to enjoy these wings!
- Cooking on High Instead of Low: I know it’s tempting to speed up the process, but trust me, low and slow is the way to go. Cooking on high might make the wings cook too fast and dry them out. Let the Crockpot work its magic on low for tender, juicy wings.
Variations & Customizations
Keto-Friendly Wings
Want to keep it low-carb? No problem! Skip the honey and swap it with a keto-friendly sweetener like stevia or erythritol. You can also add a bit of grated Parmesan to the seasoning mix for extra flavor and a nice crispy crust!
Spicy Buffalo Wings
If you’re all about that heat, swap the seasoning mix with a packet of ranch seasoning (or make your own) and toss the wings in buffalo sauce after baking. You’ll get that bold, tangy flavor that screams “spicy” without sacrificing the crispy crunch.
Vegetarian “Wings”
Want a vegetarian alternative? Try using cauliflower florets instead of chicken wings! Just follow the same steps, but bake them for about 20-25 minutes instead of the full chicken wing time. They’ll be crispy, flavorful, and totally plant-based.
Serving & Presentation Tips for Crispy Baked Chicken Wings
Plate: Once your wings are perfectly crispy and golden, arrange them on a clean, wide platter. Make them look fancy by slightly overlapping them, but don’t stack them too high. We want everyone to see that beautiful crispiness.
Add Some Fresh Greens: To make your platter pop, garnish with a handful of fresh parsley or cilantro. It adds color, freshness, and a little touch of class. If you’re feeling extra, sprinkle some finely chopped green onions on top.
Pair with Dipping Sauces: Set out a couple of dipping sauces to keep things interesting. Classic ranch and blue cheese are the go-to’s, but you could also try something like honey mustard or a spicy buffalo sauce for that extra zing! Arrange them in small bowls around the platter for easy dipping.
Side Dishes to Complement: Serve with a simple side salad or crispy fries to make it a complete meal. You can even add some celery and carrot sticks for that authentic wing experience—plus, they’ll help balance out the heat if your wings are on the spicy side.
Garnish for Extra Flavor: Squeeze a little lemon or lime juice over the wings right before serving. The citrus will cut through the richness of the wings and add a refreshing touch.
Serve with Style: Grab a nice serving tray and some stylish napkins—this is your moment to impress. Set up a little dipping station where your guests can grab their wings and sauces with ease.
How to Serve Crispy Baked Chicken Wings
To serve your crispy baked chicken wings, simply arrange them on a platter, sprinkle with fresh herbs like parsley, and place dipping sauces like ranch, blue cheese, or spicy buffalo sauce on the side.
For a full meal, pair them with fries, a light salad, or crunchy veggie sticks like celery and carrots. Finally, squeeze a little lemon or lime juice on top for a burst of freshness. Enjoy them hot, and watch everyone dig in!
Presentation Ideas for Crispy Baked Chicken Wings
Wooden Serving Board
Serve your wings on a rustic wooden board for a casual, yet stylish presentation. Line it with parchment paper for easy cleanup, and add small bowls of dipping sauces around the wings. This gives it a fun, “family-style” feel!
Mini Wire Baskets
For a cute and fun twist, serve the wings in mini wire baskets lined with parchment paper. It gives a restaurant-style vibe and makes for an adorable serving option that’s sure to impress guests.
Glass Jars for Sauces
Use small glass jars or mason jars for your dipping sauces. It’s a quirky and charming way to display them, plus it lets your guests easily dip without making a mess.
Layered Platter with Garnishes
Arrange the wings in a layered, circular pattern on a large platter, stacking them slightly for visual interest. Garnish with fresh herbs, a squeeze of lemon, or even a sprinkle of parmesan cheese for a little extra flair.
Bowl & Plate Combo
Serve the wings in a bowl placed on a larger plate. Add a side of fries or salad next to the bowl for a complete meal presentation. The contrast between the plate and bowl makes it look more polished.
Chic Dinner Plates
For an elegant dinner presentation, serve the wings on a chic, simple dinner plate. Add a side of roasted vegetables or a fresh salad to balance the richness of the wings.
Best Tips for Crispy Baked Chicken Wings
Dry Your Wings Well
The secret to crispy wings? Dry skin! Pat your wings dry with paper towels before seasoning. This helps them crisp up perfectly in the oven.
Use Baking Powder
To get extra crispiness, sprinkle a little baking powder on your wings before cooking. It’s a game-changer that gives you that golden crunch without deep-frying.
Don’t Skip the Preheat
Make sure your oven is fully preheated before baking. If you put your wings in before it’s hot enough, they won’t crisp up as well.
Flip Halfway Through
Flip your wings halfway through the baking time. This helps both sides get that crispy, golden texture instead of just one.
Let Them Rest
After baking, let the wings rest for a few minutes before serving. This allows the juices to settle and keeps them juicy on the inside while staying crispy on the outside.
Customize the Seasonings
Don’t be afraid to get creative with your spices! If you love garlic, add more garlic powder. Want a spicy kick? Throw in some cayenne pepper or chili flakes. Make it your own!
Try Double-Cooking
For extra crispiness, cook your wings, let them cool, then bake them for another 10 minutes. This double-cook method makes the skin even crispier.
Storage and Freezing Crispy Baked Chicken Wings
- Storing Leftovers: If you have leftovers (lucky you!), let the wings cool down to room temperature. Then, place them in an airtight container. They’ll stay fresh in the fridge for up to 3 days. When you’re ready to eat them, just pop them in the oven at 375°F (190°C) for about 10 minutes to get them crispy again.
- Freezing Leftovers: Want to save them for later? You can freeze your wings! After they’ve cooled completely, lay them out in a single layer on a baking sheet and freeze them for about 1-2 hours. Once frozen, transfer them to a freezer-safe bag or airtight container. They’ll keep for up to 3 months. When you’re ready to enjoy, bake from frozen at 375°F (190°C) for about 15-20 minutes, and they’ll be as crispy as the day you made them!
Frequently Asked Questions (FAQs)
- Can I use frozen chicken wings?
Yes, you can! Just make sure to thaw them completely before cooking. If you’re in a rush, you can bake from frozen, but it might take a bit longer—around 5-10 extra minutes. - How can I make the wings spicier?
If you love heat, add some cayenne pepper or chili flakes to the seasoning mix. You can also toss the wings in buffalo sauce after baking for that extra spicy kick! - Do I need to use baking powder?
While it’s not required, using baking powder is key to getting those super crispy wings without frying. It helps dry out the skin and creates that golden crunch. - Can I cook the wings in the air fryer?
Absolutely! To cook in the air fryer, just place the wings in a single layer in the basket and cook at 400°F for about 20-25 minutes, flipping halfway through. You’ll get a crispy, juicy result in no time. - What should I serve with these wings?
Fries, a simple salad, or crispy veggie sticks like celery and carrots make great sides. You can also serve them with some dipping sauces like ranch, blue cheese, or honey mustard. - Can I make these wings ahead of time?
Yes! You can prepare the wings, season them, and store them in the fridge for up to 24 hours before baking. When ready to cook, just bake them as usual. - How do I keep the wings crispy after cooking?
If you’re not eating them right away, try placing the wings on a wire rack instead of a plate. This keeps the air circulating around them and prevents them from getting soggy.
Conclusion
And there you have it! Crispy, juicy baked chicken wings that are way better than any store-bought version. Trust me, once you’ve tried these, you’ll never look at those frozen wings the same way again.
Go ahead and impress your friends or family with this easy, flavorful recipe—you’re going to get all the compliments!
Oh, and if you make your own version of these wings, I’d love to see it! Tag me on social or drop a comment below with your personal twist.
Who knows? You might even discover a new flavor combo that becomes a household favorite!
Now you may want to try
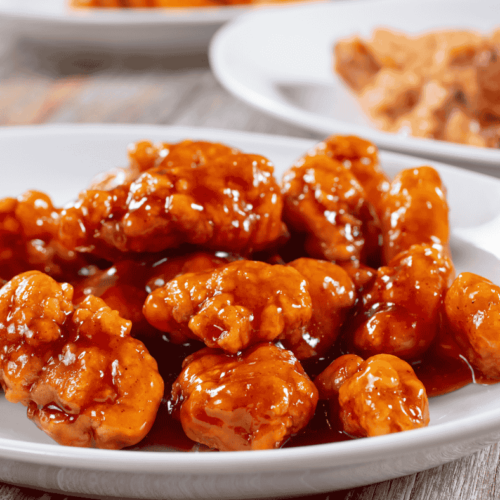
Crispy Baked Chicken Wings
Ingredients
Ingredients for Crispy Baked Chicken Wings Crockpot Recipe
- 10-12 chicken wings You can also use drumsticks if you prefer
- 1 tbsp olive oil or any oil you have on hand
- 1 tsp garlic powder
- 1 tsp onion powder
- 1 tsp paprika for a smoky flavor, you can use smoked paprika
- ½ tsp salt
- ½ tsp black pepper
- ½ tsp cayenne pepper adjust to your spice level, or leave it out if you prefer mild
- ½ cup chicken broth vegetable broth works too for a lighter option
- 1 tbsp soy sauce can substitute with coconut aminos for a gluten-free option
- 1 tbsp honey maple syrup is a great alternative for a slightly different flavor
Instructions
How to Cook Crispy Baked Chicken Wings in the Crockpot: A Step-by-Step Guide
Prep the Wings
- Start by giving your chicken wings a little rinse and pat them dry with a paper towel. We want them crispy, not soggy!
Season the Wings
- In a bowl, mix together the garlic powder, onion powder, paprika, salt, black pepper, and cayenne pepper. Toss the wings in this seasoning mix until they’re all coated, like a little flavor blanket.
Get the Crockpot Ready
- Drizzle your olive oil into the Crockpot and spread it around. Then, add the seasoned wings in a single layer. Don't worry if they’re stacked a bit—just get them in there!
Add the Liquids
- Pour the chicken broth, soy sauce, and honey over the wings. This will help them cook tender and juicy while giving them that extra flavor punch. (You’re doing great, by the way!)
Set and Forget
- Cover the Crockpot and cook on low for 4-5 hours. Yep, that's it. Just let it do its thing while you relax, catch up on a show, or pretend you're a chef. 🍳
Crisp Them Up
- Once the wings are tender, preheat your oven to 400°F (200°C). Carefully remove the wings from the Crockpot and place them on a baking sheet lined with parchment paper (because no one likes a messy cleanup!).
Bake for Crispy Goodness
- Pop those wings in the oven for 15-20 minutes, or until they’re golden and crispy on the outside. You can even flip them halfway through if you want even crispier skin.
Serve and Enjoy
- Once your wings are crispy and delicious, take a moment to admire your work. You did that! Serve them up with your favorite dipping sauce, and watch everyone be amazed by how tasty they are.
- And there you have it! Crispy, juicy wings with minimal effort. How easy was that?
Notes
- Pat wings dry before seasoning for maximum crispiness.
- Baking powder is essential for that crispy, crunchy texture.
- Feel free to adjust the seasoning or add your favorite sauce after baking for extra flavor.
- Leftovers can be stored in the fridge for up to 3 days or frozen for up to 3 months.
