Shredded Chicken Thighs And Rice Casserole Recipe
Hey there! If you’re looking for a meal that’s simple, satisfying, and perfect for busy days, you’re in the right place.
I don’t know about you, but sometimes I just want a dish that feels like a warm hug—something that makes me feel right at home. This Shredded Chicken Thighs and Rice Casserole is exactly that.
It’s one of those meals that’s easy to throw together but always hits the spot. You won’t need fancy ingredients or hours in the kitchen. Just a few basic things, and you’re good to go!
And, it’s full of flavor, the best of all? You can make it ahead of time, so there’s more time to relax and less stress.
I promise you, this will quickly become one of your go-to recipes. I’m so excited for you to try it out and see just how simple yet delicious it can be.
So grab your apron, and let’s get cooking. I’m with you every step of the way!
Ingredients for Shredded Chicken Thighs and Rice Casserole
- 4 bone-in, skinless chicken thighs (or boneless, skinless if you prefer)
- 1 ½ cups white rice (or brown rice for a healthier twist)
- 1 small onion, diced
- 2 cloves garlic, minced
- 2 cups chicken broth (or vegetable broth for a lighter version)
- 1 cup shredded cheese (cheddar works great, but feel free to swap with mozzarella or a mix)
- 1 teaspoon paprika
- ½ teaspoon dried thyme
- Salt and pepper, to taste
- 1 tablespoon olive oil (or any cooking oil you have on hand)
- 1 cup frozen peas (optional, but adds a nice pop of color and flavor)
Key Substitutions:
- Chicken thighs: You can easily use chicken breasts instead if that’s what you have in your fridge.
- Rice: Feel free to swap out white rice for brown rice or even quinoa for a different texture.
- Cheese: Try using a dairy-free cheese if you’re looking for a dairy-free option!
How to Cook Shredded Chicken Thighs and Rice Casserole
- Preheat the oven to 375°F (190°C). Get that oven nice and toasty while we work on the rest.
- Cook the chicken: Heat the olive oil in a large skillet over medium-high heat. Season your chicken thighs with salt, pepper, paprika, and thyme. Sear the chicken on both sides for about 3-4 minutes until they’re golden brown. You’re just giving them a little color, so don’t worry if they’re not fully cooked through yet.
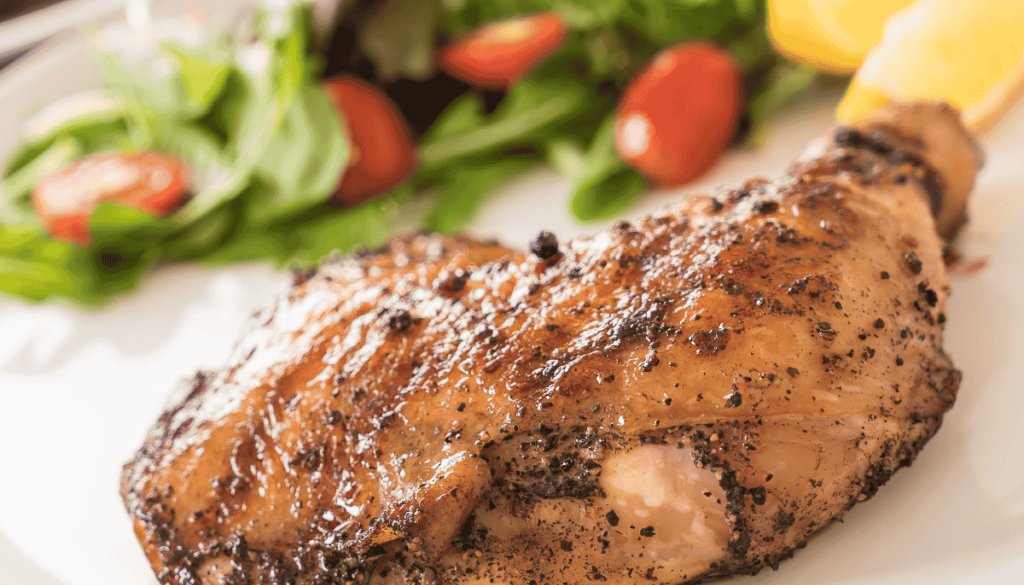
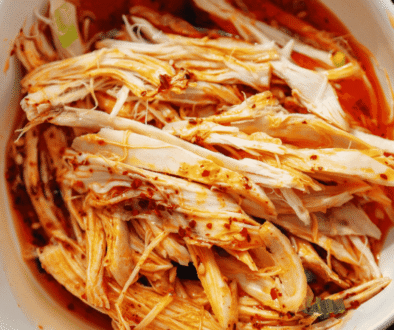
- Shred the chicken: Once the chicken’s done cooking, remove it from the skillet and let it cool for a minute (you don’t want to burn your fingers!). Shred the chicken using two forks or your hands—whatever works best for you!
- Sauté the onion and garlic: In the same skillet, add the diced onion and minced garlic. Cook for about 2-3 minutes until the onion is soft and smells amazing. You’ll know it’s ready when your kitchen starts to smell like heaven. 😋
- Add the rice and broth: Stir in the rice and chicken broth. Bring it to a simmer, then cover the skillet with a lid. Let it cook for about 5 minutes, just enough to get everything mixed and warm.
- Combine everything: Now, take your shredded chicken and mix it into the rice mixture. Stir it all together and make sure it’s evenly combined. Don’t forget to season with a little more salt and pepper to taste. It’s all about those flavors, right?
- Transfer to a casserole dish: Pour the chicken and rice mixture into a greased casserole dish. Spread it out evenly—try not to make a mess (but no promises!).
- Add the cheese: Sprinkle your shredded cheese on top. Feel free to add a little extra because, let’s be real, cheese makes everything better.
- Bake: Pop the casserole dish into the oven and bake for about 25-30 minutes, or until the cheese is melted and bubbly. You’ll know it’s ready when your kitchen smells like comfort food and the cheese is golden and delicious.
- Serve & Enjoy: Once it’s out of the oven, let it cool for just a minute before diving in. Grab a spoon (or fork, your choice) and dig into this cozy, comforting casserole.
Mistakes to Avoid
- Skipping the sear on the chicken
- Don’t be lazy! I know it’s tempting to just toss the chicken in the oven, but searing it first adds so much flavor. It gives that golden, crispy outer layer that makes the casserole even more delicious. Trust me, your taste buds will thank you!
- Don’t be lazy! I know it’s tempting to just toss the chicken in the oven, but searing it first adds so much flavor. It gives that golden, crispy outer layer that makes the casserole even more delicious. Trust me, your taste buds will thank you!
- Not letting the rice simmer
- Rice needs a little TLC! If you skip the simmering step before baking, your rice might not cook properly in the casserole. Make sure to let it bubble away with the chicken broth so it soaks up all those tasty flavors. Otherwise, you’ll end up with crunchy rice (and no one wants that!).
- Rice needs a little TLC! If you skip the simmering step before baking, your rice might not cook properly in the casserole. Make sure to let it bubble away with the chicken broth so it soaks up all those tasty flavors. Otherwise, you’ll end up with crunchy rice (and no one wants that!).
- Overcrowding the casserole dish
- Don’t squish it in there! If you’re using a smaller casserole dish, the ingredients might not cook evenly. Make sure there’s enough room for everything to spread out—this ensures the cheese gets perfectly melted and bubbly without any dry spots.
- Don’t squish it in there! If you’re using a smaller casserole dish, the ingredients might not cook evenly. Make sure there’s enough room for everything to spread out—this ensures the cheese gets perfectly melted and bubbly without any dry spots.
- Under-seasoning
- Don’t be shy with the seasoning! Chicken thighs are great for holding flavor, but they need a little help from you. Don’t skimp on the salt, pepper, and spices. Taste your mixture before baking and adjust if needed. No bland casseroles here!
- Don’t be shy with the seasoning! Chicken thighs are great for holding flavor, but they need a little help from you. Don’t skimp on the salt, pepper, and spices. Taste your mixture before baking and adjust if needed. No bland casseroles here!
- Not letting it rest before serving
- Give it a minute to breathe! Once the casserole comes out of the oven, let it sit for 5-10 minutes. This lets the cheese set and the flavors settle. Plus, you won’t burn your mouth on that first bite (and we all know how tempting it is to dig in right away!).
- Give it a minute to breathe! Once the casserole comes out of the oven, let it sit for 5-10 minutes. This lets the cheese set and the flavors settle. Plus, you won’t burn your mouth on that first bite (and we all know how tempting it is to dig in right away!).
- Using the wrong chicken
- Don’t go for bone-in, skin-on chicken! You want to use bone-in, skinless thighs for this recipe. The skin will add unwanted grease, and the bone-in version can be harder to shred. Boneless, skinless thighs are your best bet for a tender, easy-to-shred casserole!
Variations & Customizations
Keto-Friendly Version
It’s a low-carb alternative that soaks up all the yummy flavors, and you won’t even miss the real thing. You can also ditch the peas to keep the carb count super low. This version will still give you that comforting casserole feel without the extra carbs.
Spicy Version
Bring the heat with some spicy additions! Add 1-2 chopped jalapeños or a teaspoon of chili powder when you’re sautéing the onions and garlic. If you’re feeling wild, throw in a bit of hot sauce or cayenne pepper to really kick things up. You’ll love that extra spicy kick with every bite!
Vegetarian
Go veggie by swapping the chicken for a hearty plant-based protein like chickpeas or tofu. Shred the tofu for a “meaty” texture, or use roasted chickpeas for a crunchy bite. Toss in some extra veggies like bell peppers, zucchini, or spinach to make it a veggie-packed casserole that even meat-lovers will enjoy.
Serving and Presentation Tips
Let it Rest
After you pull your casserole out of the oven, let it sit for 5-10 minutes. This helps the cheese set and makes it easier to serve. Trust me, you’ll thank yourself later when it doesn’t all fall apart on the plate.
Serve it Hot
This dish is best served warm, straight from the oven. The cheesy top and tender chicken are best when they’re still bubbling. It’s like a cozy blanket of comfort food in every bite!
Garnish for a Pop of Color
Add a little extra flair by garnishing your casserole with fresh herbs like parsley or chives. Not only does it make the dish look gorgeous, but it adds a fresh, bright flavor that balances out the richness.
Serve with a Side Salad
Pair it with a simple side salad (think: leafy greens, cherry tomatoes, and a light vinaigrette) to add a refreshing crunch that contrasts with the creamy casserole. It’s like the perfect combo of comfort and freshness.
Make It Family-Style
If you’re serving guests or family, leave the casserole in the dish and let everyone serve themselves. Grab a big spoon, scoop up a generous portion, and serve on individual plates. This keeps it casual, and everyone loves digging in!
Bonus Serving Tip
If you’re feeling fancy, sprinkle some crispy breadcrumbs or crushed crackers on top of the casserole for a little crunch. It adds texture and gives a beautiful golden finish.
This dish is already mouthwatering, but these tips will take it to the next level. Get ready for the compliments!
How to Serve the Shredded Chicken Thighs and Rice Casserole
Simply scoop out a generous portion of the casserole and serve it hot on individual plates.
For an extra touch, garnish with fresh herbs like parsley or chives for a pop of color and freshness.
Pair it with a light side salad or steamed veggies to balance the richness. Serve family-style in the casserole dish for a relaxed vibe, and don’t forget to enjoy it while it’s warm and cheesy!
Best Tips for Shredded Chicken Thighs and Rice Casserole
Use Bone-In, Skinless Thighs
For the juiciest, most flavorful chicken, stick with bone-in, skinless thighs. The bone adds flavor, and the skinless cut ensures it’s easy to shred. You’ll get that perfect shredded chicken texture every time.
Let the Rice Absorb the Broth
Before baking, let the rice simmer in the chicken broth to soak up all those flavors. This step ensures the rice is fully cooked and perfectly tender, rather than crunchy or underdone.
Sear the Chicken First
Don’t skip the searing step! It creates a flavorful crust on the chicken that adds richness to the casserole. Plus, it helps lock in the juices, keeping your chicken moist and tender.
Season Generously
The flavors in this casserole come from the seasoning, so don’t be shy with the salt, pepper, and spices. Taste the mixture before baking, and adjust the seasoning if needed. A pinch more salt or a dash of paprika can really make a difference!
Rest Before Serving
After baking, let the casserole rest for about 10 minutes before serving. This allows the flavors to settle and makes it easier to scoop out without everything falling apart.
Add a Crunchy Topping
For an added texture, top the casserole with crispy breadcrumbs or crushed crackers before baking. This gives the casserole a golden, crispy finish that contrasts perfectly with the creamy filling.
Make-Ahead Option
If you’re short on time, assemble the casserole ahead of time and store it in the fridge. When you’re ready to eat, just pop it in the oven for a quick and easy meal!
These tips will take your casserole from good to wow, so keep them in mind for the best results!
Storage and Freezing Instructions
Storing Leftovers in the Fridge
Once the casserole has cooled to room temperature, cover it tightly with plastic wrap or foil. Store it in the fridge for up to 3-4 days. If you want to keep it in the baking dish, just cover it with a lid if it has one, or use foil.
Freezing for Later
If you want to freeze it for a rainy day, let the casserole cool completely first. Then, wrap it tightly in plastic wrap and place it in a freezer-safe container or freezer bag. You can store it in the freezer for up to 2-3 months.
Reheating
To reheat from the fridge, simply pop the casserole in the oven at 350°F (175°C) for about 20 minutes, or until heated through. If it’s frozen, let it thaw overnight in the fridge, then reheat as you would leftovers. You can also microwave individual portions for a quicker option.
Tip for Freezing
If you plan to freeze the casserole, consider freezing it in smaller portions for easy reheating. This way, you won’t have to thaw and reheat the whole thing every time you want a meal.
Frequently Asked Questions (FAQs)
Can I use chicken breasts instead of thighs?
Absolutely! While chicken thighs are juicier and more flavorful, you can use boneless, skinless chicken breasts if you prefer. Just make sure to cook the chicken thoroughly before shredding it.
Can I make this recipe ahead of time?
Yes, you can! You can assemble the casserole a day or two in advance, cover it, and refrigerate it until you’re ready to bake. Just add a few extra minutes to the baking time if it’s cold from the fridge.
Can I substitute the rice?
Definitely! If you prefer to avoid rice, try cauliflower rice for a low-carb option. It will still soak up all the flavors and provide a similar texture.
Can I add other vegetables?
Yes, feel free to get creative! You can add veggies like bell peppers, zucchini, spinach, or even corn to the casserole for extra flavor and color.
How can I make this dish spicier?
If you like a bit of heat, add some chopped jalapeños, a pinch of cayenne pepper, or a few dashes of hot sauce to the casserole before baking. Spice it up to your liking!
Can I freeze leftovers?
Yes! You can freeze this casserole for up to 2-3 months. Just make sure to let it cool completely before wrapping it tightly and storing it in a freezer-safe container or bag.
Can I use a different cheese?
Of course! While cheddar and mozzarella work best, feel free to swap them out for other types of cheese like gouda, Monterey Jack, or even a spicy pepper jack for an extra kick.
Conclusion
And there you have it—your new favorite casserole recipe that’s about to become a regular in your kitchen!
I bet once you try this out, you’ll never want to go back to store-bought casseroles again. You’ll be the hero at every dinner party or family gathering.
Feel free to get creative with this dish and make it your own—whether you add some spicy flair or sneak in extra veggies. I’d love to see how you make it your own, so don’t forget to share your version! Who knew a casserole could be this fun, right? 😄
Now you may want to try

Shredded Chicken Thighs and Rice
Ingredients
Ingredients for Shredded Chicken Thighs and Rice Casserole
- 4 bone-in skinless chicken thighs (or boneless, skinless if you prefer)
- 1 ½ cups white rice or brown rice for a healthier twist
- 1 small onion diced
- 2 cloves garlic minced
- 2 cups chicken broth or vegetable broth for a lighter version
- 1 cup shredded cheese cheddar works great, but feel free to swap with mozzarella or a mix
- 1 teaspoon paprika
- ½ teaspoon dried thyme
Salt and pepper, to taste
- 1 tablespoon olive oil or any cooking oil you have on hand
- 1 cup frozen peas optional, but adds a nice pop of color and flavor
Key Substitutions:
- Chicken thighs: You can easily use chicken breasts instead if that’s what you have in your fridge.
- Rice: Feel free to swap out white rice for brown rice or even quinoa for a different texture.
- Cheese: Try using a dairy-free cheese if you're looking for a dairy-free option!
Instructions
How to Cook Shredded Chicken Thighs and Rice Casserole: A Step-by-Step Guide
Preheat the oven to 375°F (190°C). Get that oven nice and toasty while we work on the rest.
Cook the chicken: Heat the olive oil in a large skillet over medium-high heat. Season your chicken thighs with salt, pepper, paprika, and thyme. Sear the chicken on both sides for about 3-4 minutes until they’re golden brown. You’re just giving them a little color, so don’t worry if they’re not fully cooked through yet.
Shred the chicken: Once the chicken’s done cooking, remove it from the skillet and let it cool for a minute (you don’t want to burn your fingers!). Shred the chicken using two forks or your hands—whatever works best for you!
Sauté the onion and garlic: In the same skillet, add the diced onion and minced garlic. Cook for about 2-3 minutes until the onion is soft and smells amazing. You’ll know it’s ready when your kitchen starts to smell like heaven. 😋
Add the rice and broth: Stir in the rice and chicken broth. Bring it to a simmer, then cover the skillet with a lid. Let it cook for about 5 minutes, just enough to get everything mixed and warm.
Combine everything: Now, take your shredded chicken and mix it into the rice mixture. Stir it all together and make sure it’s evenly combined. Don’t forget to season with a little more salt and pepper to taste. It’s all about those flavors, right?
Transfer to a casserole dish: Pour the chicken and rice mixture into a greased casserole dish. Spread it out evenly—try not to make a mess (but no promises!).
Add the cheese: Sprinkle your shredded cheese on top. Feel free to add a little extra because, let’s be real, cheese makes everything better.
Bake: Pop the casserole dish into the oven and bake for about 25-30 minutes, or until the cheese is melted and bubbly. You'll know it’s ready when your kitchen smells like comfort food and the cheese is golden and delicious.
Serve & Enjoy: Once it's out of the oven, let it cool for just a minute before diving in. Grab a spoon (or fork, your choice) and dig into this cozy, comforting casserole.
- Enjoy every bite—you earned it!
Notes
- For a lower-carb option, you can swap out the rice for cauliflower rice.
- Make sure the rice absorbs the chicken broth fully for a creamy, flavorful casserole.
- Feel free to add extra veggies like bell peppers, spinach, or corn to boost the nutrition and flavor!


