")
Beef Tallow Recipe
Hey, you know how some recipes just take everything to another level, like fries that taste richer, roasted veggies with that perfect crisp, or flaky pie crusts that make you do a double-take?
The secret might just be beef tallow.
If you’ve never made it at home, don’t stress out, I’ve got you. It’s simple, it’s pure, and honestly, it’s a game-changer in the kitchen.
Why You’ll Love This Recipe
-
Budget-friendly—you’re using scraps you’d probably throw out.
-
Incredibly flavorful—adds deep richness to anything you cook.
-
Natural and clean—no weird ingredients or additives.
-
Long shelf life—great for stocking your pantry or fridge.
-
Perfect for high-heat cooking like frying, roasting, or searing.
-
Old-school kitchen magic—your grandma probably used it, and she was right.
Ingredients Needed
-
Beef fat trimmings (suet is ideal, but any clean beef fat works)
-
A splash of water (just to start the rendering process)
That’s it. No fancy stuff.
Step-by-Step Instructions
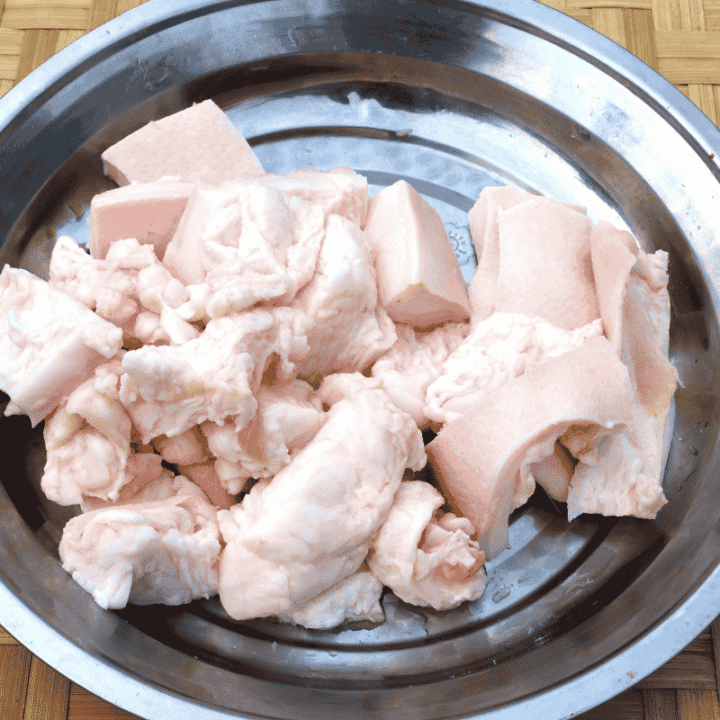
Step 1: Chop the fat
Trim off any meat or bloody spots. Cut the fat into small pieces, about ½-inch chunks. The smaller, the better—it renders faster.
Step 2: Add fat to a pot
Place your fat chunks in a large, heavy-bottomed pot or Dutch oven. Add just a few tablespoons of water to prevent the fat from sticking or burning early on.
Step 3: Heat it low and slow
Set your stove to low heat. Let the fat melt slowly. Stir occasionally. You don’t want it to fry—you want it to render. This can take 1.5 to 2 hours.
Step 4: Strain it
Once the fat has mostly turned to clear, golden liquid and the solid bits (cracklings) are browned and crispy, turn off the heat. Carefully strain the liquid through a fine mesh strainer or cheesecloth into a heatproof jar or container.
Step 5: Cool and store
Let it cool to room temperature, then seal the jar. It’ll turn creamy white as it solidifies.
Pro Tips for the Best Beef Tallow
-
Use suet if you can—it renders down cleaner and faster.
-
Low and slow is the name of the game—don’t rush it.
-
Stir occasionally to prevent burning at the bottom.
-
Use cheesecloth for super smooth, clean tallow.
-
Keep cracklings (the browned bits left behind)—they’re salty, crunchy gold. Toss them on salads or snacks.
Common Mistakes to Avoid & How to Perfect the Recipe
-
Using high heat, which burns the fat and gives you a bitter taste.
-
Skipping the water at the start – it helps prevent scorching.
-
Not trimming meat bits – they’ll make your tallow taste funky.
-
Leaving it unattended too long – keep an eye out to avoid burning.
-
Pouring while too hot – let it cool slightly before straining to avoid burns or broken jars.
Serving and Presentation Ideas
-
Scoop it into small jars for gifting or easy storage.
-
Label and date your jars—looks tidy and helps track freshness.
-
Use vintage-style mason jars if you’re feeling a little rustic.
-
Keep one jar on the counter (if you use it often) and the rest in the fridge.
-
Sprinkle cracklings with salt and serve as crispy snacks.
Variations and Recipe Swaps
-
Try pork fat (lard) instead—it works the same way.
-
Use bone marrow fat for a deeper flavor.
-
Add herbs like rosemary or thyme for a scented tallow (strain well after).
-
Infuse garlic into the fat for roasted veggie magic.
-
Use leftover fat from cooked roasts—strain and store just like tallow.
Storage and Reheating Tips
-
Fridge: Store in an airtight jar for up to 3 months.
-
Freezer: Freeze in portions (ice cube trays work great) for up to 1 year.
-
Room temp: Okay for 1–2 weeks if your kitchen is cool and clean.
-
Reheat gently in a small saucepan when needed—don’t microwave unless it’s in short bursts.
-
Always use a clean spoon to scoop, so it lasts longer.
What to Serve with Beef Tallow
-
Roast potatoes or sweet potatoes—they get crisp and golden.
-
Pan-seared steaks or burgers—for that deep beefy flavor.
-
Fried eggs or hashbrowns—hello, breakfast upgrade.
-
Sautéed greens—like kale or collards.
-
Homemade pie crusts or biscuits—seriously, don’t knock it till you try it.
FAQs
Q: What is beef tallow exactly?
A: It’s rendered beef fat. Basically, you melt it down, strain it, and it becomes a shelf-stable cooking fat.
Q: Is beef tallow the same as lard?
A: Not quite. Lard comes from pigs. Tallow is beef-based. Both are rendered fats, just from different animals.
Q: Can I use beef tallow for frying?
A: Absolutely. It has a high smoke point, so it’s perfect for frying anything from fries to chicken.
Q: Is beef tallow healthy?
A: It’s natural and minimally processed, and great in moderation. It’s rich in saturated fats, so balance is key.
Q: How do I know when it’s done rendering?
A: The liquid fat will be clear and golden, and the solids (cracklings) will be browned and crispy.
Q: Can I mix fats when rendering?
A: Technically, yes—but it’s best to keep types separate so you know what flavor you’re working with.
Q: Why did my tallow smell weird?
A: That usually means there was too much fat on the fat, or it was cooked too hot and burned.
Conclusion
Beef tallow might seem old-school, but once you make it yourself, you’ll totally get why it’s still around.
It’s rich, super useful, and kind of satisfying to make from scratch.
Try it out, and let me know what you cook with it.
I’d love to hear how yours turns out—or what you do with those crunchy cracklings!
You Might Also Love
- Crispy Hot Honey Garlic Chicken Sauce
- Ground Beef Stroganoff With Mushroom
- Crispy Chicken Beef Birria Tacos
⤵⤵⤵
Beef Tallow
All-natural, rich cooking fat made by slowly rendering beef fat at home. Ideal for frying, roasting, baking, and bringing next-level flavor to simple meals.
Ingredients
- Beef fat trimmings (suet is ideal, but any clean beef fat works)
- A splash of water (just to start the rendering process)
Instructions
Step 1: Chop the fatTrim off any meat or bloody spots. Cut the fat into small pieces, about ½-inch chunks. The smaller, the better—it renders faster.
Step 2: Add fat to a potPlace your fat chunks in a large, heavy-bottomed pot or Dutch oven. Add just a few tablespoons of water to prevent the fat from sticking or burning early on.
Step 3: Heat it low and slowSet your stove to low heat. Let the fat melt slowly. Stir occasionally. You don’t want it to fry—you want it to render. This can take 1.5 to 2 hours.
Step 4: Strain. Once the fat has mostly turned to clear, golden liquid and the solid bits (cracklings) are browned and crispy, turn off the heat. Carefully strain the liquid through a fine mesh strainer or cheesecloth into a heatproof jar or container.
Step 5: Cool and storeLet it cool to room temp, then seal the jar. It’ll turn creamy white as it solidifies.
Notes
Nutrition Information
Yield About 1.5 to 2 cupsAmount Per Serving Calories Approx. 115 per tablespoon
")
")
")