Japanese Chicken Katsu Curry Recipe
Alright, let’s talk about Japanese Chicken Katsu Curry today. If you’ve never had it before, you’re in for a real treat.
Imagine crispy, golden fried chicken on top of fluffy rice, all smothered in a rich, savory curry sauce. Sounds good, right?
Here’s the thing: It’s way easier to make than it sounds. And you don’t need to be a kitchen expert to pull this off either—I promise, it’s simple, and I’ll show you exactly how to do it.
I make this all the time when I’m craving something warm and comforting, but I don’t want to spend all day cooking.
The combination of crispy chicken and the curry sauce is seriously next level.
I’m not exaggerating when I say this dish has quickly become one of my favorites.
It’s cozy, flavorful, and so satisfying. You’re going to love it. And hey, once you try it out, you’ll probably be making it once a week, just like me.
So, let’s get cooking. Trust me, you’re going to be so glad you did.
What is Japanese Chicken Katsu Curry, and Why You Need to Make It
Japanese Chicken Katsu Curry is a comforting, flavorful dish that combines crispy, breaded chicken (katsu) with a rich, savory curry sauce, served over a bed of rice.
It’s the perfect balance of crunchy and saucy, making each bite super satisfying.
Not only does it taste amazing, but it’s also surprisingly easy to make, even for beginners!
The curry sauce is mild but full of flavor, making it great for any palate.
And, it’s a crowd-pleaser—serve it at your next dinner, and your guests will be impressed without you spending hours in the kitchen.
Total cooking time? Just about 30-40 minutes.
How to Cook Japanese Chicken Katsu Curry: (Step-by-Step)
Alright, let’s get cooking. Here’s how to make that crispy chicken katsu and rich curry sauce:
Step 1: Prepare the Chicken
Start by slicing your chicken breasts in half horizontally. You want them thin so they cook fast and crisp up nicely. Season both sides with salt and pepper. You know the drill—season it like you mean it!
Step 2: Bread the Chicken
In three shallow bowls, set up a breading station:
- One for flour (seasoned with salt and pepper).
- One for beaten eggs.
- One for panko breadcrumbs.
Dredge the chicken in the flour, dip it in the eggs, and coat it with panko. Press down a little to make sure the crumbs stick. Now, you’ve got some serious crunch coming your way.
Step 3: Fry the Chicken
Heat oil in a large pan over medium-high heat. Once it’s hot (but not smoking), carefully lower the chicken into the pan.
Fry for about 3-4 minutes per side until golden brown and crispy. Remove the chicken and set it aside to rest.
Step 4: Make the Curry Sauce
In the same pan, reduce the heat and add a little more oil if needed. Throw in your onions and cook until they’re soft and golden (about 5 minutes).
Add garlic and ginger, then cook for another minute until they smell amazing.
Now, stir in the curry powder, soy sauce, and a touch of sugar.
Pour in the broth, bring it to a simmer, and cook for 10 minutes, letting the flavors mix and thicken up a bit.
Step 5: Slice the Chicken
While the sauce simmers, slice your chicken into strips. Look at that crispy exterior—just waiting to be dunked in that curry sauce!
Step 6: Assemble
Serve the rice, top it with the crispy chicken, and pour that glorious curry sauce over everything. Don’t hold back—this sauce deserves to be on every bite.
Enjoy!
Take a moment and enjoy your dinner.
And there you have it—Japanese Chicken Katsu Curry in less than an hour. You’ve totally got this!
Common Mistakes to Avoid
Skipping the Chicken Seasoning
Don’t just slap the chicken in the pan without seasoning. Trust me, you’re not just making crispy chicken—you’re making flavor-packed crispy chicken. A pinch of salt and pepper goes a long way!
Not Preheating the Oil
You have to get the oil hot before frying. If the oil isn’t hot enough, the chicken will just soak it up like a sponge, and you’ll end up with soggy, greasy pieces instead of crispy perfection. Wait until it’s shimmering in the pan. Patience, my friend.
Overcrowding the Pan
Yes, I know, it’s tempting to throw all the chicken in at once. But listen—give each piece some space to breathe (well, not literally, but you get it). Frying them in batches will keep them crispy and golden, not soggy and sad.
Burning the Curry Sauce
The curry sauce is delicate! Don’t rush it. Stir occasionally, and keep the heat on low once it’s simmering. If you let it cook too fast, the flavors won’t have time to develop, and you’ll end up with something that’s, well, not curry.
Not Letting the Chicken Rest
I know it’s hard, but don’t skip the “resting” part after frying. Resting the chicken helps keep it juicy and keeps that crispy exterior intact. Trust me, the wait is worth it!
Forgetting the Rice
This sounds silly, but seriously—make sure your rice is ready before the chicken is done. There’s nothing worse than piping hot curry and no rice to serve it on. Get it cooking while you prep the chicken!
Serving Cold Curry
Warm curry sauce is a must! I get it—sometimes you just want to eat already, but cold curry isn’t going to impress anyone. Keep it warm on low heat while you’re plating everything up.
Avoid these slip-ups, and you’ll be on your way to Katsu Curry greatness!
Best Tips for Making Japanese Chicken Katsu Curry
Use Panko Breadcrumbs for Extra Crispiness
Panko breadcrumbs are key to that perfect, crunchy coating. They’re lighter and crispier than regular breadcrumbs, giving you the ultimate texture. Don’t skimp on this!
Don’t Rush the Frying
Fry the chicken in batches to make sure it gets that golden, crispy crunch without overcrowding the pan. It might take an extra minute or two, but trust me—it’s worth it for that crunch.
Make Your Own Curry Sauce
While store-bought curry sauce works in a pinch, homemade is always better. It’s easy to make, and you can adjust the seasoning to your taste. Plus, you get that rich, authentic flavor that will impress anyone at the table.
Let the Chicken Rest
Once the chicken’s fried, give it a few minutes to rest before slicing. This keeps all the juices inside, so your chicken stays tender while the outside stays crispy. No one likes dry chicken, right?
Serve with Fresh Rice
Make sure your rice is freshly cooked and hot when you serve it. It’s the perfect base for the curry and gives you that cozy, comforting vibe.
Add a Little Heat
If you like a bit of spice, feel free to add a dash of chili powder or a small chopped chili to the curry sauce. It’ll give your dish a nice kick without overpowering the flavors.
Don’t Skip the Garnishes
A sprinkle of sesame seeds, green onions, or even a dash of fresh cilantro can really elevate the dish and add a pop of color. Plus, it makes you look like you really know what you’re doing in the kitchen!
Follow these tips, and you’ll have a perfect Chicken Katsu Curry every time!
Serving Suggestions for Japanese Chicken Katsu Curry
- Pickled Veggies on the Side: The tangy crunch of pickled vegetables pairs perfectly with the rich and savory curry. Try serving it with some quick pickled cucumbers, radishes, or even a tangy Japanese pickle to balance out the flavors.
- Steamed Vegetables: Lightly steamed veggies, like broccoli, carrots, or green beans, make a great side to the dish. They add a fresh, crunchy texture that complements the warmth of the curry.
- A Side of Miso Soup: For a more authentic Japanese meal, serve your katsu curry with a bowl of miso soup. It’s light and soothing, and it really rounds out the meal.
- Crispy Tempura: If you want to go all out, serve your curry with a side of crispy tempura shrimp or veggies. The extra crunch will take your meal to the next level.
- Cold Sake or Iced Green Tea: Pair your katsu curry with a refreshing glass of iced green tea or even a cold glass of sake. The light, crisp drinks complement the savory and rich flavors of the dish without overpowering it.
- Fried Eggs: Add a fried egg on top of your katsu curry for an extra layer of flavor. The creamy yolk blends perfectly with the curry sauce and rice, making every bite even more delicious.
With any of these sides, your Chicken Katsu Curry will go from great to unforgettable!
Storage and Freezing Instructions for Japanese Chicken Katsu Curry
Storing Leftovers:
If you have any leftovers (lucky you!), store the chicken and curry sauce separately in airtight containers.
This helps keep the chicken crispy when reheated, and the sauce doesn’t make the chicken soggy. Let both cool down to room temperature before storing them in the fridge.
- Chicken: Keep it in the fridge for up to 2 days. Reheat in a hot pan for that crispy texture.
- Curry Sauce: The sauce can be stored in the fridge for up to 4 days. Reheat it on low heat, stirring occasionally, until it’s warmed through.
Freezing:
You can also freeze the curry sauce if you want to save it for later. Here’s how:
- Let the sauce cool completely, then pour it into a freezer-safe container or a zip-top bag.
- Label it with the date and freeze for up to 3 months.
- When you’re ready to use it, defrost overnight in the fridge or reheat straight from frozen (just add a little extra water or broth if it thickens too much).
Reheating Tips:
For the best results, reheat the chicken in a hot pan or oven to keep it crispy, and reheat the curry sauce on low heat on the stove.
And if you freeze the rice, just microwave it or steam it to warm it up!
With these simple tips, you’ll have a tasty, ready-to-go meal whenever the craving hits again!
Frequently Asked Questions (FAQs)
Can I use chicken thighs instead of breasts?
Absolutely! Chicken thighs will give you a juicier, more flavorful result, and they work perfectly with the crispy coating. Just make sure to adjust the cooking time, as thighs can take a little longer to cook through than breasts.
Can I make the curry sauce ahead of time?
Yes, you can! The curry sauce actually tastes even better the next day as the flavors have more time to meld together. Just store it in the fridge for up to 4 days, or freeze it for longer storage.
Is this recipe spicy?
Not really! The curry sauce is flavorful, but it’s not spicy. If you like some heat, feel free to add a small chopped chili or a dash of chili powder to the sauce. Start with a little, and taste as you go.
Can I make this dish gluten-free?
Yes! Simply swap the regular breadcrumbs for gluten-free panko breadcrumbs, and make sure the curry sauce ingredients (like soy sauce) are gluten-free as well. Easy swap, same delicious result!
Can I use store-bought curry sauce?
You sure can! If you’re short on time, store-bought curry sauce works fine. But I’d highly recommend making the sauce from scratch if you can—it’s simple and so much tastier.
How can I make the chicken extra crispy?
For extra crunch, make sure you press the panko breadcrumbs onto the chicken after dipping it in the egg. You could also double-coat the chicken by dipping it in the egg and breadcrumbs twice before frying. Trust me, it’ll be extra crispy!
Can I add vegetables to the curry sauce?
Totally! Adding carrots, potatoes, or peas to the curry sauce can make it more hearty and add extra flavor. Just chop them up small and add them when you simmer the sauce.
What kind of rice should I use?
You’ll want to use short-grain white rice for this dish. It’s sticky and perfect for soaking up all that delicious curry sauce. But if you’re out of short-grain, any kind of white rice will work fine!
Got more questions? Just ask in the comments!
Conclusion
And there you have it—your very own Japanese Chicken Katsu Curry! It’s crispy, flavorful, and guaranteed to impress.
Once you make this at home, you’ll never want to go back to store-bought curry again.
Seriously, you’ll laugh at the idea of using a jar of sauce after tasting how fresh and delicious this is!
So, what are you waiting for? Get in that kitchen, make it, and enjoy every crunchy, saucy bite.
And hey, when you’re done, snap a pic and share your version with me! I’d love to see how it turned out.
You Might Also Want To Try These Delicious Ones…
- Crispy Garlic Parmesan Crusted Pork Chops
- Ground Beef And Cheese Chimichanga
- Leftover Oven-Fried Rice
————-
⤵⬇⬇
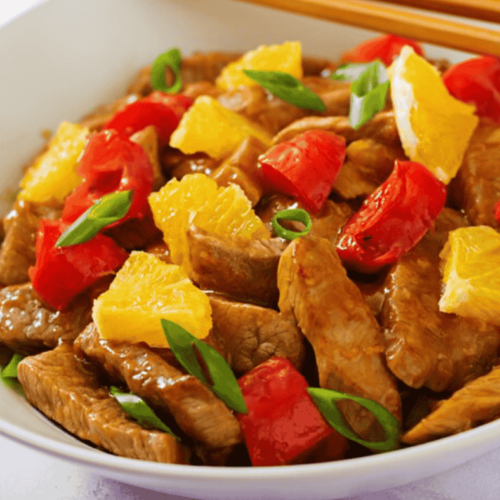
Japanese Chicken Katsu Curry
Ingredients
Ingredients:
- 4 boneless skinless chicken breasts
- Salt and pepper to taste
- 1 cup all-purpose flour
- 2 large eggs beaten
- 2 cups panko breadcrumbs
- 2 tablespoons vegetable oil for frying
- 1 medium onion chopped
- 2 cloves garlic minced
- 1 tablespoon fresh ginger grated
- 2 tablespoons curry powder
- 1 tablespoon soy sauce
- 1 teaspoon sugar
- 2 cups chicken broth
- 4 cups cooked white rice for serving
- Optional garnishes: green onions sesame seeds
Instructions
Step-by-Step Cooking Instructions:
Prepare the chicken: Slice the chicken breasts horizontally, season with salt and pepper.
Bread the chicken: Coat the chicken in flour, dip in egg, and cover with panko breadcrumbs.
Fry the chicken: Heat oil in a pan and fry chicken for 3-4 minutes per side, until golden and crispy. Set aside.
Make the curry sauce: In the same pan, cook onions, garlic, and ginger. Add curry powder, soy sauce, and sugar. Pour in the broth, and simmer for 10 minutes.
Assemble: Slice the chicken, place it on rice, and pour curry sauce over everything. Serve hot.
Notes
- For extra crunch: Double-coat the chicken for a super crispy texture.
- Make it spicy: Add chili powder or chopped chili to the curry sauce for a kick!
- Rice tip: Short-grain rice is the best option for this dish, but any white rice works.
