
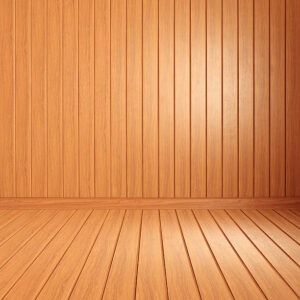
How to Create a Wooden Panel Wall With Shelves?
Quick Disclaimer: This post may contain affiliate links, if you purchase a product through those links, I may receive a small commission with no extra cost to you. Thanks. I only Recommend Products I Trust!
MoreYou can even tie it into your balcony decor or use it as part of deck decorating to keep everything looking connected.
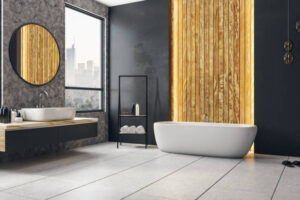
From a modern house exterior to cozy corners inside, wooden wall paneling blends well with almost any style.
You can even pair it with black decor for a bold, clean finish.
Related:
- 10 Gorgeous Living Room Decor Ideas You’ll Fall In Love
- 13 Minimalist Living Room Ideas You’ll Want to Steal
- How To Make Every Room Feel Warm And Inviting: Cozy House Tips
How to Create a Wooden Panel Wall With Shelves
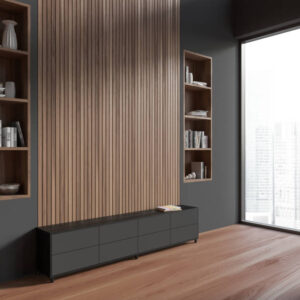
Why a Wooden Panel Wall Makes Sense
Ever wish your wall could do more than just sit there? That’s the beauty of a wooden panel wall.
It adds depth, texture, and warmth to any room while giving you practical shelving.
Imagine walking into your living room and seeing neat rows of books, picture frames, or living room plants perfectly displayed against rich wood. Sounds inviting, right?
💡Quick Note: You have to see these 100+ tips to save money in your house that you are paying needlessly right now. Click Here To See Now!
The best part is how flexible this project is.
Whether you want a rustic charm, a modern vibe, or even something that complements your black decor, wall paneling can handle it.
And if you’re working with furniture for small spaces, shelves built into the wall free up valuable floor area without sacrificing style.
Step 1: Planning Your Panel Wall
Before you grab tools, you need a plan. Ask yourself a few questions:
- Where will the wall go—living room, bedroom, or maybe balcony decor for an outdoor vibe?
- Do you want just a feature wall or a full shelving unit across an entire wall?
- How much weight do you expect the shelves to hold?
Sketch a quick design. Don’t stress about perfect drawings; a rough layout helps you picture how your wall paneling and shelves will work together.
Step 2: Picking the Right Wood
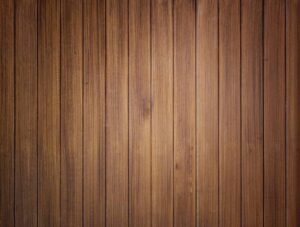
Not all wood is created equal. The type you choose sets the mood.
- Pine or Cedar: Affordable, easy to cut, and great for casual spaces.
- Oak or Walnut: Rich, darker tones that scream elegance.
- Reclaimed Wood: Adds character with knots, grain, and imperfections.
If your home has a modern house exterior, smooth panels like oak or walnut will flow beautifully inside.

If you’re going for something more natural, reclaimed wood paired with living room plants gives you that earthy balance.
Step 3: Gathering Tools and Materials

Here’s what you’ll need for most wooden panel wall projects:
- Wooden panels (pre-cut or custom sizes)
- Shelves (matching or contrasting wood)
- Level, measuring tape, and pencil
- Screws, wall anchors, and brackets
- Drill and saw
- Sandpaper and stain or paint
Optional:
- LED strip lights for a warm glow under shelves
- Decorative brackets for an industrial touch
Keep everything ready before you start; it saves you from running to the store mid-project.
Step 4: Prepping the Wall
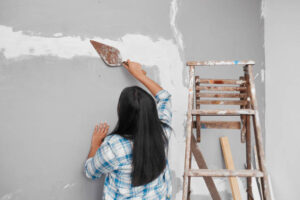
You wouldn’t paint over a dirty wall, right? The same goes here.
- Clear the area of furniture.
- Wipe the wall clean to remove dust and grease.
- Check for studs using a stud finder. You’ll need these for shelf support.
- Mark out your design with painter’s tape so you can visualize spacing.
Ever tried hanging a shelf without finding the studs? Yeah, not a fun story. Avoid the crash later by doing the prep now.
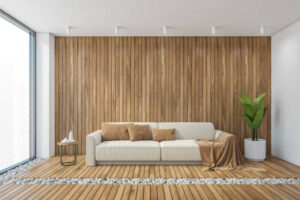
Step 5: Installing the Panels
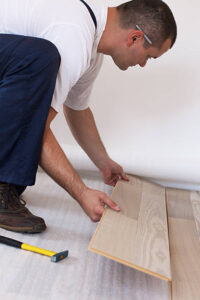
Now comes the hands-on part.
- Start from one corner and work your way across.
- Use a level to make sure each panel is straight.
- Nail or screw the panels into studs or secure them with strong adhesive if they’re lightweight.
- For a clean finish, sand any rough edges.
Want a bold twist? Pair wooden panels with black decor accessories like matte brackets or frames for a sleek, modern edge.
Step 6: Adding the Shelves
Your shelves bring function to the design.
- Decide how many shelves you want and their spacing.
- Use a level to mark straight lines across the paneling.
- Install brackets first, then place the shelf on top.
- Secure with screws to ensure stability.
If you’re styling for deck decorating or balcony decor, consider fewer shelves with open space for plants or lanterns.
Indoors, you can go heavier with books, photo frames, and storage baskets.
Step 7: Styling Your New Wall
This is where your wall really comes alive.
- Add living room plants for a touch of green. Small pots or hanging planters look great against wood.
- Mix textures: wood shelves, metal frames, ceramic pots.
- Stick to a color theme, think warm tones, or pair with black decor for contrast.
- Keep balance in mind: don’t overload one shelf while leaving another bare.
If you’re tight on space, this setup doubles as both decoration and storage.
That’s why it works perfectly alongside furniture for small spaces, everything looks neat without feeling cramped.
Step 8: Finishing Touches
Want your wooden panel wall to look polished? Here’s how:
- Apply a coat of stain or paint to protect the wood and match your room’s vibe.
- Add hidden LED lighting under shelves for a cozy evening glow.
- Use minimal décor if your wall is already bold.
Think of it like dressing up, you don’t need every accessory, just the right ones.
💡Quick Note: You have to see these 100+ tips to save money in your house that you are paying needlessly right now. Click Here To See Now!
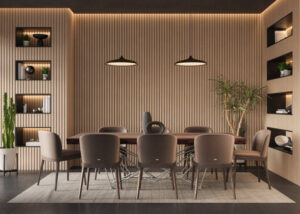
Creative Ideas for Wooden Panel Walls With Shelves

Rustic Farmhouse Feel
Go with wide planks and distressed wood. Add mason jars, family photos, and living room plants in clay pots.
Sleek Modern Style
Use narrow panels painted in black or gray. Pair with clean-lined shelves and black decor pieces like vases or photo frames.
Outdoor Vibes
For deck decorating or balcony decor, try weatherproof panels with potted herbs, candles, and string lights.
Why It’s Worth the Effort
At first glance, building a wooden panel wall might feel like a big job.
But once you step back and see the finished wall, you’ll know it’s worth every screw and nail. You get:
- Extra storage without bulky furniture
- A stylish upgrade to plain walls
- A way to tie in your modern house exterior with your indoor space
- A perfect mix of function and design
And let’s be real, there’s a certain pride in saying, “Yeah, I built that wall myself.”
Conclusion
Creating a wooden panel wall with shelves isn’t just about building something useful, it’s about transforming your space.
Whether you’re showcasing living room plants, making the most of furniture for small spaces, or adding a bold touch with black decor, this project balances beauty and practicality.
From indoor corners to deck decorating and balcony decor, wooden wall paneling works almost anywhere.
It ties rooms together, saves space, and makes your home feel more personal.
So, next time you look at that blank wall, ask yourself: “Wouldn’t it look better covered in wood with shelves full of my favorite things?”
FAQs
- Can I build a wooden panel wall in a rental home?
Yes, but go with removable panels or temporary adhesive options to avoid damaging walls. - Which wood stain works best for paneling?
Light stains brighten small spaces, while dark stains pair beautifully with black decor and modern designs. - How much does it cost to build a wooden panel wall with shelves?
Costs vary, but expect around $150–$400 depending on wood type, shelf size, and hardware. - Is wall paneling hard to maintain?
Not at all. Dust weekly and wipe with a damp cloth. For outdoor deck decorating, use weatherproof finishes. - Can I use this idea for outdoor spaces like a balcony?
Absolutely! Just make sure you choose treated wood and weather-resistant brackets for long-lasting balcony decor.


